Portable Bluetooth Speakers

how do you set it up

Embark on a Quest with how do you set it up

Step into a world where the focus is keenly set on how do you set it up. Within the confines of this article, a tapestry of references to how do you set it up awaits your exploration. If your pursuit involves unraveling the depths of how do you set it up, you've arrived at the perfect destination.

Our narrative unfolds with a wealth of insights surrounding how do you set it up. This is not just a standard article; it's a curated journey into the facets and intricacies of how do you set it up. Whether you're thirsting for comprehensive knowledge or just a glimpse into the universe of how do you set it up, this promises to be an enriching experience.

The spotlight is firmly on how do you set it up, and as you navigate through the text on these digital pages, you'll discover an extensive array of information centered around how do you set it up. This is more than mere information; it's an invitation to immerse yourself in the enthralling world of how do you set it up.

So, if you're eager to satisfy your curiosity about how do you set it up, your journey commences here. Let's embark together on a captivating odyssey through the myriad dimensions of how do you set it up.

Showing posts sorted by relevance for query how do you set it up. Sort by date Show all posts

How To Set Up A VPN On Your Smart TV: 5 Easy Methods


How to set up a vpn on your smart tv 5 easy methods to put how to set up a vpn on your smart tv 5 easy chuck how to set up a vpn on your smart tv 5 easy dessert how to set up vpn in windows 10 how to set up a vpn on android how to set up a vpn tunnel how to set up a vpn on a mac how to set up a go fund me page how to set up a chess board how to set up venmo how to set up voicemail on iphone how to set a mouse trap
How to Set Up a VPN on Your Smart TV: 5 Easy Methods


How to Set Up a VPN on Your Smart TV: 5 Easy Methods

Most smart TVs aren't compatible with virtual private networks right out of the box, but pretty much any smart TV can be hooked up to a VPN. Even if your TV isn't of the smart variety, you may still be able to use a VPN on it -- as long as you have the right equipment.

One of the two big reasons why you may want to hook a VPN up to your smart TV is if you want to stream geographically restricted content. The other is if you want to keep your TV watching activities private and effectively hidden from your internet service provider.   

There are a couple of different ways you can go about setting up your VPN to work with your TV. But which route you choose to take will depend on your personal preference, technical know-how, budget and what equipment you have on hand. We'll show you some of the ways you can set a VPN up on a TV and highlight why you would want to do so.

Why use a VPN on a TV?

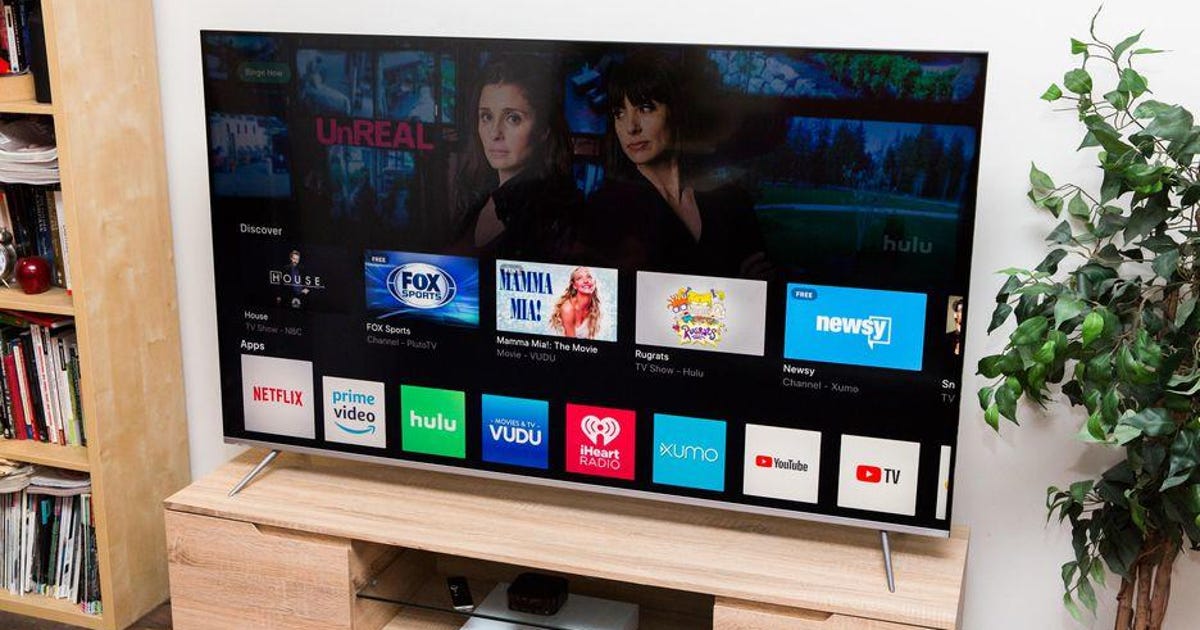
Today's TVs aren't just for watching local network programming or cable TV. They're also for streaming video on demand from your go-to streaming providers

The amount of streaming content available today might seem limitless already, but some content is regionally locked. If you're itching for more, or if the programming you want to watch isn't available in your country, you can use a VPN on your smart TV to spoof your location to access virtually any of the content you may want. 

If, say, you're in the UK but you want to stream programming that's only available in the US, then you can hook your VPN up to your smart TV and connect to a server in the US. Since the VPN changes your IP address to a US IP address in the process, the streaming service you're visiting will assume you're in the US and serve up American programming, even if you're across the Atlantic. Just make sure to check with your streaming service of choice to confirm that using a VPN doesn't violate its terms of service. You don't want to risk losing access to your streaming account for any reason. 

Even if unblocking geo-restricted video content on your smart TV isn't of particular interest to you, you may want to use a VPN on your TV as a way of preventing your ISP from being able to monitor your viewing habits or keep track of the internet activity being generated by your smart TV. 

When you connect to a VPN, you establish an encrypted connection between your device and the internet via a VPN server in a remote location. This means that all of the internet traffic you're transmitting through that encrypted VPN connection is hidden from any entity with an intent to monitor your activity, including your ISP. When you hook up a VPN to your TV and connect to a VPN server, your ISP won't be able to see what you're watching or otherwise decipher any of the internet activity transmitted or received by your TV.

How to set up a VPN on a smart TV

Like any software or service, your first step here is to work backward from what's available for your operating system. The most VPN-friendly smart TV OSes are Amazon Fire TV and Google's Android TV and Google TV platforms. That said, if you use Roku, Apple TV or the built-in operating systems for Samsung, Vizio, LG or any other platform, you still have options. 

Here are a few of the most practical ways you can go about hooking up a VPN to your smart TV. 

If you have Fire TV

If you have one of Amazon's new Fire TVs, you'll be able to download your VPN directly to your TV, provided your VPN offers a Fire TV app. Not all VPNs offer compatibility with Amazon Fire devices, so you'll need to pick one that does if you decide to go this route. The VPNs we recommend that are compatible with Amazon Fire devices include Surfshark, NordVPN and ExpressVPN. If you don't already subscribe to one of those VPN providers, then go ahead and sign up and download the provider's app from the Amazon Appstore. (All three offer a 30-day money-back guarantee, so you can try each one risk-free to see which one works best for you).

Once you've downloaded the app and signed into your VPN account through your Amazon Fire TV, you can connect to a VPN server. As long as you're connected to the VPN on your Fire TV, you can unblock streaming content and hide your viewing habits from your ISP.

If you have an Android/Google TV

Similarly, if your smart TV runs on Google's Android operating system, then you can set up a VPN on your TV by simply downloading your VPN's app from the Play Store directly onto your TV. And even though Google is in the midst of rebranding Android TV as it transitions to a slicker, more user-friendly platform in Google TV, you'll still be able to access Android apps in the Play Store after you've upgraded to Google TV since it still runs Android under the hood.  

What you'll need to do first is to get a VPN that works on Android, if you don't have one already. Then, navigate over to the Play Store on your Google TV, search for your VPN provider's app and download it. Once you've downloaded the VPN app to your TV, sign in and connect to a VPN server. 

If you want to unblock US-only content, then you'll need to connect to a VPN server in the US, or to a server in the UK for UK-only content, and so on. If all you want to do is protect your TV watching privacy and prevent your ISP or other entities from monitoring your viewing activity, then we'd recommend connecting to a VPN server closest to your physical location, in order to achieve optimal connection speeds through your VPN. 

The potentially more difficult (and more expensive) way

If your TV doesn't run on the Android operating system, then one of the ways you can set up a VPN on your smart TV is by running a VPN connection through a router. But proceed with caution. Not all routers support VPN connections, so if you don't already have one, you'll need to purchase a compatible router -- which can get pricey if you want a router that can handle the VPN connection and deliver a smooth streaming experience. Also, installing a VPN on your router (even if it is compatible) won't necessarily be plug-and-play, and you risk ruining your router or voiding its warranty if you botch the installation process. 

Fortunately, the best VPN providers on the market do offer step-by-step instructions for router installations for a variety of VPN-compatible router models in their help sections and have support staff on hand to help you. So you don't have to go it alone completely, but the process still isn't entirely risk-free. If you don't want to complete the install yourself, some VPNs, through a company called FlashRouters, are happy to sell you routers with VPN compatibility already preinstalled on them. This could be the way to go if you don't want to risk installing it yourself, but keep in mind that you'll be paying a premium of probably about $100 to $150 over and above retail for your preconfigured VPN router.

So, once you've got your VPN successfully installed on your router and configured it with the servers you intend to use, you can go ahead and connect to a VPN server through your router firmware's dashboard. You'll want to make sure your TV is connected to your VPN router to ensure it's using the VPN connection and you're able to unblock the content you want and keep your TV viewing activity private.

See also: The Pros and Cons of Using a VPN on a Router

The resourceful way

If you don't have a Google TV or a VPN-compatible router, and don't intend to purchase either, you can use the equipment you have on hand to share your VPN connection with your smart TV. 

You could accomplish this by running an ethernet cable from your computer to your smart TV. But on top of stringing a long wire from computer to TV, this method may require additional adapters, depending on what kinds of devices you have. Once you've got the connection between your TV and computer established, then connect to a VPN server on your computer and you're all set. The wired connection may not be the most practical solution, but it's an option. 

The simplest and most practical way to go about this would be to use your laptop or desktop as a Wi-Fi hotspot and connect your TV to your computer wirelessly. 

Note that if you're using MacOS, you'll need to manually set up the VPN on your Mac using either the L2TP or IKEv2 VPN protocol and connect your Mac to your router via an ethernet cable to share your VPN connection over Wi-Fi. Your VPN provider will have specific instructions on how to manually set up its service on your Mac.  

On Windows:

  • Go to Settings -> Network & Internet -> Mobile hotspot 
  • Click on Edit to set a network name and password for your hotspot
  • Select Wi-Fi under Share my internet connection over
  • Toggle the Mobile hotspot to the On position under Share my internet connection with other devices
  • Connect your smart TV to the hotspot you just created as you would any other Wi-Fi network and connect to your VPN on your PC

On Mac:

  • Connect your Mac to your Wi-Fi router using an ethernet cable (use an adapter if your Mac doesn't have an ethernet port)
  • Go to System Preferences -> Sharing 
  • Click on Internet Sharing in the left panel
  • Select your VPN connection from the Share your connection from dropdown
  • In the To computers using box, check Wi-Fi
  • Click on Wi-Fi Options in the bottom-right corner
  • Set a network name and password for your hotspot, select WPA2 Personal in the Security field and click OK
  • Click on the box next to Internet Sharing in the left panel and click Start in the dialogue box that pops up
  • Connect your TV to the Wi-Fi hotspot you just created as you would any other Wi-Fi network and connect to your VPN on your Mac

The 'I don't have a smart TV' way  

Even if you don't have a smart TV, you're in luck because you can set a VPN up on it if you're able to connect a streaming device like a Roku, Amazon Firestick or Google Chromecast to the TV. These ingenious little devices essentially turn any TV with an HDMI port into a smart TV, at a much lower cost than an actual smart TV. 

Basically, you can use the methods listed above to connect a VPN to your TV -- and if you go with Chromecast with Google TV or Amazon Firestick then you can download the VPN directly via the Play Store or the Amazon Appstore, respectively. The only difference is that you'll use your streaming device's interface to connect to the VPN instead of directly via your TV interface. You'll still get all the privacy and unblocking benefits that a VPN offers if you decide to take this route, but only for content you watch through your streaming device.     

Roku stick and remote

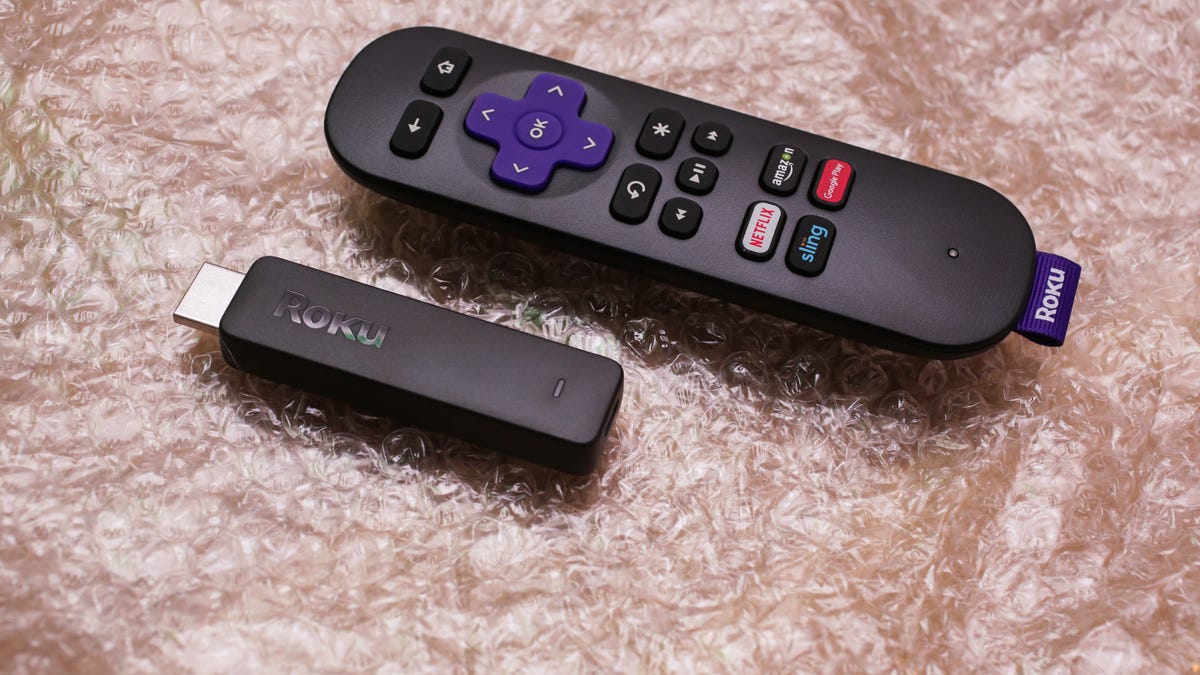
Streaming devices like the ones offered by Roku and others can turn your ordinary TV into a smart TV.

Sarah Tew/CNET

Next steps

When you're thinking about setting up a VPN on your smart TV, there are a few things to consider. First of all, you'll want a VPN that provides fast speeds that are sufficient in supplying a smooth streaming experience free of buffering. You'll also want to make sure the VPN you select has servers located in the countries you want to unblock content from. 

If you have a Google TV and intend to download the VPN app to your TV from the Play Store, then the VPN you go with will need to be Android-compatible. And your VPN will need to be Amazon Fire TV-compatible if you want to run the VPN directly on your Amazon Fire TV. 

If you'd rather run the VPN through your router and connect your TV that way, then it's important to make sure your VPN supports router connections and has router setup guides that include your router of choice. It doesn't hurt for your VPN to have helpful, knowledgeable technical support, either, in case you need assistance with your setup. 

You'll also want your VPN to provide the privacy protections necessary to keep your viewing habits private and safe from prying eyes. 

The VPNs we recommend that fit the bill and check all those boxes include ExpressVPN, Surfshark, and NordVPN. Any of those options will get the job done for your unblocking and privacy needs on your smart TV.


Source

Get A New Mac? Here's What You Need To Know About Setting It Up


Get a new mac here s what you need to know about setting itself right get a new mac here s what you need to know about setting itaitek get a new mac here s what you need to know about settings get a new mac here s mud in your eye origin get a new mac here s the thing alec baldwin get a new gmail account how to get a new medicare card get a new ss card
Get a new Mac? Here's what you need to know about setting it up


Get a new Mac? Here's what you need to know about setting it up

Apple's newest computers -- MacBook Air, MacBook Pro and Mac Mini -- are fast, have impressive battery life and can even run iPhone apps. The difference between this crop and previous models? These are powered by the Apple Silicon M1 processor. It's the same kind of processor the company uses in the iPhone and iPad. If you spoiled yourself and picked up a new Mac this holiday season, or were lucky enough to get one as a gift, don't rush through the setup process. 

Whether you're replacing a worn-down MacBook or getting rid of a tired PC, it's only natural to want to tear open the box, hit the power button and cruise through the setup prompts. But before you do that, take a deep breath and a step back. There are some things you need to know about setting up a Mac.

For starters, the process can take several hours if you plan on transferring your data from another computer. Then there are other things to consider: Do you need FileVault? How can you get information off of your old Mac or PC and onto the new one? Those questions are exactly why we're here.

img-1734

There's something special about getting a new computer. 

Dan Ackerman/CNET

What you'll need

Make sure to set aside around an hour to get your Mac set up. The process will take longer if you plan on restoring your Mac from a Time Machine backup of another Mac.

In addition to a reliable internet connection, you'll need your Wi-Fi network information, your Apple ID username and password, and the Mac's charger or power cord. 

Having a piece of paper and a pen nearby is helpful. During the setup process, you'll be asked to create a user account, which includes a username and password. We don't recommend storing passwords on paper -- it's much safer to use a password manager -- but a piece of paper is helpful for temporarily storing this kind of information until you can enter it into your password manager. Just make sure to destroy the piece of paper when you're done. 

Once you have everything in order, connect the charger or power cord to your Mac and turn it on. 

Mac Setup Assistant.png

Setting up a new Mac isn't hard, but it can take some time. 

Apple

Apple's Setup Assistant walks you through most of the process

The first time your Mac turns on, a setup assistant will greet you. The assistant will walk you through selecting your country and language, and connecting the Mac to the internet. You'll also be tasked with creating a user account on the Mac and signing into your Apple ID. 

Throughout the process you'll be asked if you want to enable services like FileVault, iCloud Keychain or Find My Mac. You'll also be asked if you want to enable Siri or provide any logs to developers when issues are detected. Here's what some of those features mean for you.

FileVault encrypts your Mac's hard drive to prevent unauthorized access to the information you store on it. If you aren't sure, you can always enable or disable it in the future.

iCloud Keychain is Apple's password manager that's built into all of its devices. If you use iCloud Keychain on an iPhone ($500 at Best Buy) or iPad ($176 at Amazon), those usernames and passwords will also be available on your Mac. iCloud Keychain also stores your Wi-Fi network credentials, meaning you won't have to log into a Wi-Fi network on your Mac if you've previously connected to it on your iPhone. It's a good idea to turn on iCloud Keychain. 

Find My Mac works with the Find My app to help you track down a lost Apple device. I recommend turning on Find My Mac, even for a rig as large as an iMac ($990 at Best Buy) that's less likely to disappear, because you never know when you might end up with a lost or stolen MacBook. There's no drawback to turning it on.

If you have a MacBook, you'll also be tasked with setting up Touch ID, the fingerprint reader that unlocks your computer, lets you sign into apps or approve Apple Pay purchases. All of it is pretty straight-forward, just continue to follow the prompts, entering any required information such as your Apple ID or creating a user name, to finish the core of the setup process. 

macos-high-sierra-migration-assistant

Migration Assistant makes it easy to transfer all of your information. 

Apple

Restore from a Time Machine Backup

During setup, you'll be asked if you want to restore your new Mac from a Time Machine backup of another Mac through Migration Assistant. If so, you'll need the storage device your Time Machine backup is stored on. 

If you haven't backed up your old Mac through Time Machine, it's not too late. We have a guide that walks you through the process. Or if you'd rather directly transfer your files and settings from one Mac to another, Migration Assistant can do that, too

Follow the prompts in the Migration Assistant tool, selecting that you want to transfer your information from a Time Machine backup. Select the Time Machine drive that's connected to your new Mac, and select the most recent backup.  

Next, you'll be asked to confirm which information you want to transfer -- including home folders, applications, settings, user accounts and other miscellaneous documents. 

The process can take several hours, depending on how much you have to transfer. If it's going to be awhile, you don't have to babysit it. It's perfectly fine to leave your computer and go watch a show, let it process overnight, or even run some errands. 

One thing to keep in mind, and Migration Assistant will remind you if you run into this, is that your new Mac needs to be on the same OS update as your old Mac (or vice versa). So you may have to finish the setup process without using Migration Assistant, then update your OS (directions covering how to do that are below), and then run Migration Assistant. 

If you're switching from a PC to a Mac, you can use Apple's Migration Assistant, but the process is a little bit more involved and technical (just at the beginning). Apple walks you through the process in this support article. 

48-macbook-pro-16-inch

Once you have your Mac all set up, it's time to get to work! 

Sarah Tew/CNET

Install any software updates

Once you've completed the Setup Assistant and find yourself looking at your Mac's desktop, it's a good idea to check for any pending software updates. 

To do that, click on the Apple logo in the top-left corner of the screen followed by System Preferences > Software Update

Once your Mac's software is up to date, you'll also want to check and make sure all of the preinstalled apps are updated in the App Store. Find the App Store icon in the app dock along the bottom of your screen. Click on it to open the App Store and then select Updates and then update any apps with pending updates. 

Now that you have your Mac all set up, it's a good idea to be prepared for any hiccups you may run into. Here are system tweaks you may want to make right away. If this is the first time you've used MacOS Big Sur, we have plenty of tips to help you get started. When your Mac inevitably slows down, learn how to speed it back up again


Source

How To Factory Reset A MacBook, Windows Laptop Or Chromebook To Sell Or Give Away


How to factory reset a macbook windows laptop or chromebooks how to factory reset a macbook windows download how to factory reset a macbook windows xp how to factory reset a macbook air how to factory reset a chromebook how to factory reset airpods how to factory reset samsung phone how to factory reset computer how to factory reset iphone without passcode
How to Factory Reset a MacBook, Windows Laptop or Chromebook to Sell or Give Away


How to Factory Reset a MacBook, Windows Laptop or Chromebook to Sell or Give Away

One side effect of spending more time at home during the pandemic is the realization that I have a lot of old tech lying around. A lot. Then, when I made a KonMari attempt at decluttering said tech, I unearthed several things I forgot I had -- including an old laptop I stopped using years ago because it was too slow for my high-end computing needs. 

While this laptop no longer sparked joy for me, it turned out to be a perfect fit for my mom. It just needed to be cleaned up first, and I'm not just talking about removing dust and mystery goo with a few swipes of a disinfectant wipe, though you'll want to do that, too. The type of cleaning I'm talking about is restoring the laptop to like-new condition inside and out. Cleaning the outside is the easy part. Wiping the computer of all your apps, files, folders and other personal information isn't necessarily as straightforward. Of course, how much data scrubbing you need to do will likely depend on the recipient. 

The big picture steps you take to refresh a laptop are the same regardless of whether it's a Windows laptop. Apple MacBook or Chromebook -- save your old data, remove all personal information, then go for a factory reset. It's the actual step-by-step procedure that differs depending on the type of laptop you're dealing with. Below, you'll find everything you need to know and do before giving your laptop a second life. And with supply chain issues, shipping problems and chip shortages making new devices harder to get, passing along a new-to-you laptop can be a welcome holiday gift. 

Last thing first

I typically save the laptop's physical cleaning until last (why clean your fingerprints off twice?), but you may want to start there -- especially if it's been gathering dust in the back of a closet/under a bed/in the garage for the past several years. The basic equipment required for a good laptop cleaning is a can of compressed air and some disinfectant or alcohol wipes. For a slightly deeper clean, you may also want to grab a screwdriver and remove the bottom cover of your laptop (if possible) so you can carefully blow out any dust that's accumulated on the fans and vents. 

After the laptop is clean, you can also wipe down the power adapter and any related accessories. It's also a good idea to ensure the power adapter is still in good, working condition. If you're still not quite sure where to start with the cleaning, check out our complete guide to getting your laptop looking its best.


Gifting a used MacBook

macbook-air-2018-analisis-3
Óscar Gutiérrez/CNET

Before you even think about doing a factory reset on your MacBook, you need to save any data you want to keep. You may have already done this at some point if you migrated data from this old MacBook to a new one using using Apple's Migration Assistant. If that's not the case, it's time to hook up an external drive and use MacOS' built-in Time Machine tool to create a backup. If you have an iCloud account, you can back up your data there as well. 

Sign out of everything

You'll also want to log out of all accounts before wiping your MacBook's drive. Start with iCloud, Find My Mac and iMessage. Then look for individual software accounts you may need to deregister. If you use a browser other than Safari, such as Chrome or Firefox, you should sign out of those as well. Basically, if it's got personal account information, you'll want to sign out. (Here's how to find account settings in MacOS.)

Two other things you should do before a factory reset: Unpair any Bluetooth devices -- particularly if the MacBook is being gifted to someone in your household -- and reset the NVRAM. The latter is memory that holds onto settings that the MacBook needs before loading MacOS. On startup, press and hold Option-Command-P-R to reset the NVRAM.

Perform a factory reset

If you've done everything above, you're ready to return your MacBook to its out-of-the-box state. On an Intel-based Mac, reboot the system and press and hold Command-R to enter Recovery Mode. (Accessing Recovery Mode on MacBooks running on the company's Apple Silicon chips is different, however.) 

Read more: Before selling your MacBook, you need to factory reset it

Once in Recovery Mode, you'll see a window of MacOS utilities. Use the Disk Utility to erase your drive. When that's complete, you'll be able to reinstall MacOS. After it's done reinstalling, you'll reach the Setup Assistant. From there you can stop and shut it down or set it up for the recipient. 


Gifting a used Windows laptop

reset-windows-10-laptop.png
Screenshot by Josh Goldman/CNET

As with gifting a MacBook, start by backing up any important folders and files on your old laptop to cloud storage or an external drive. If you're doing the latter, go to Settings > Update & Security > Backup > Add a drive and select the external drive. Then click on Backup Now. 

Sign out of all your apps

A lot of paid software requires you to sign in with an account, a product key or both. Before you wipe your laptop's storage, sign out of any accounts and deregister software licenses (if possible). If you need those product keys to re-register software on a new laptop, be sure to save that information. If you use a browser other than Edge, such as Chrome or Firefox, sign out of those as well. Basically, if it's got personal account information, sign out.

Reset the laptop

Ready to clean the drive and reinstall Windows? Go to Settings > Update and security > Recovery. At the top of the window, you'll see Reset this PC. Click on Get Started and select Remove Everything from the box that appears. From there, you can select to reinstall Windows from the local drive or download from the cloud. After that, Windows cleans the drive of all software, settings and data. When it's done, the laptop will start in its setup assistant mode. You can then stop and shut it down for a fresh-out-of-the-box experience or do some setup, which is nice touch, especially if it's going to a family member so they can use it right away.

Unlink from your Microsoft account

If you used a Microsoft account to sign in to the laptop, the last thing you'll want to do is remove the laptop from that account. Sign in to your account from another computer and click on the Devices tab at the top of the page. Find the laptop that you're gifting on the list of devices, and at the bottom of the listing, you'll see the option to remove the device. Click it and you're done. 


Gifting a used Chromebook

Asus Chromebook CX9400
Sarah Tew/CNET

Chromebooks are the easiest to refresh for gifting. That's mainly because of their cloud-based design. Google also makes it extremely easy to wipe your data and securely clean the internal storage as well as remove the Chromebook from your Google account. 

Check the AUE first

Before you even consider gifting an old Chromebook, check its auto-update expiration. Google only guarantees Chrome OS and browser feature support on non-Google hardware for so long. Every device has a date on which it stops receiving updates, aka its AUE date. Current models receive updates for eight years; older models could potentially be a year or two away from reaching their AUE. 

Google maintains an AUE list, so finding the date your Chromebook will stop receiving updates is as easy as locating your model on that list. The AUE can also be found in your Chromebook's settings. Here's how to find the AUE from Google and in your Chromebook.

Give it a Powerwash

Powerwash is Google's built-in factory reset tool for Chromebooks. Once you've backed up folders or files stored on the Chromebook's internal drive, running Powerwash will securely scrub the system and reboot. When it restarts, it'll be just like the day you unboxed it. 

The actual Powerwash typically takes less than a minute to complete. A simple search for "powerwash" in your Chromebook's settings will bring you right to the feature, but here's everything you need to know about the procedure. 

Remove the Chromebook from your Google account

Although you've removed your account from the Chromebook, you haven't removed the Chromebook from your account. Start by signing into your Google account and head to the Security settings. If you use the Chrome browser, you can also click on your account avatar and select Manage your Google Account from the drop-down menu. 

In the Security section, scroll down until you see a box labeled Your devices, which lists all the devices attached to your account. At the bottom of the box, click on Manage devices and find the Chromebook you're gifting and select Sign Out

Give the Chromebook a good external cleaning, gather up any accessories and it's ready to hand off to your giftee.

Read more: How to regift a game console

How Factory Reset Your Devices

Make sure to wipe personal data before selling, trading in or regifting your gear.


Source

https://ajaranhx.jawop.my.id/

.

Elden Ring Boss Guide: How To Beat Margit, Godrick, Radahn, And More


Elden Ring Boss Guide: How To beat Margit, Godrick, Radahn, and more


Elden Ring Boss Guide: How To beat Margit, Godrick, Radahn, and more

Elden Ring is out  and like every other Souls-like game there are times when you confront a major foe who will put your survival skills to the test.

Elden Ring has the largest roster of bosses and secret encounters of any Souls-style game to date, and people are quickly figuring out how unforgiving these bad guys can be. So with that, we're offering a quick rundown of general tips to know when facing these bosses. Along with that, a guide on defeating some of the first major bosses of the game.

Check back with us in the coming days as we'll be adding more guides and tips on overcoming the big bads of The Lands Between.

General Boss tips

Learn Their Patterns

While every boss can be daunting, they each have a pattern that they follow rigorously. The most important thing you can learn when fighting enemies is how they move and what behaviors they follow. This knowledge can be a bit tough to learn, especially when you have swords and magic spells being hurled at your face. But once you do, you'll get a sense of how a boss' attacks work and what you can do to overcome them.

Don't Rely on Rolling Too Much

Rolling in Elden Ring is vital to every battle, but it's easy to abuse it. The move gives players a small window of invincibility on any attack, so it appears that spamming it would be the right answer to whatever scenario. Do not do this. FromSoftware purposely makes enemies' attacks reach a certain distance for when you roll. Bosses also have multiple quick and delayed attacks to throw off the timing of your rolls. Keep that in mind even in the heat of the battle.

If you need to roll, especially for boss battles, try rolling toward the boss. It sounds counterintuitive but the way FromSoftware designs boss attacks, going toward the boss helps you evade, as the expectation is for you to roll away. If there's one attack constantly hitting you when you roll away, that's when you need to roll forward.

Being Greedy is Dangerous

We know the feeling you can get when a particular foe gets caught in a vulnerable spot, and you want to keep attacking them. However, it's important not to be greedy in those moments. Before you know it, a boss can quickly recover and send you flying with a powerful counterattack. Always be mindful of the time it takes to attack. It's often better to go in for a couple of quick hits and back away to safety, even if there's time for another set of blows.

Make Sure to Use Your Summons

As players progress through the game, they'll receive more summons. These spirits can be somewhat weak and do minimal damage, but they distract the boss. These assists provide a small respite from the battle, allowing you to heal or set up a powerful charge or jumping attack. Calling on a summon should be the first thing players should do in a boss battle. 

For the boss fights of legacy dungeons, there is usually a summon right next to the golden fog gate. Keep an eye out for an orange symbol on the ground as these fighters are powerful and can help you tremendously in these hard battles. You might need to find these NPCs within the dungeon before they will help.  

Finish The Fight, Later

FromSoftware always finds ways to catch you off guard. An example is the Tree Sentinel, a big brute of a boss, in the game's first area. It's a powerful foe that can kill you in two hits. This encounter may give you the impression that you have to beat him at this moment, but trust us when we say that is not the case. You'll inevitably come across some foes that will knock you out in a quick fashion. While you can certainly try and figure a way to beat them, you're often better off just taking the hint and doing something better with your time. You can always come back later once you're stronger and get some revenge -- and those moments are always satisfying.

Now let's take a look at some specific bosses...

Margit, The Fell Omen

margit

Margit, the Fell Omen can be a daunting foe to face in your first hours with the game.

From Software / Namco Bandai Games

This encounter is likely the first major boss you'll face in Elden Ring and they will certainly put you through your paces. The battle against Margit is, above all, a test of your dodging, attack skills and patience during a fight. Despite its size, Margit is highly mobile and can easily close the distance to land some hits on you if you aren't careful. The boss primarily uses their staff as a close-range weapon, striking with three-hit combo attacks and a harder two-handed blow that can drop your stamina fast if you try to block it. Margit will throw magic daggers at a distance at a range, and it's best to avoid them by dodging.

The best way to strike Margit is to hit them once they've finished performing their attacks. By looking at their attack patterns, you can have a window of opportunity to hit them with quick strikes. It's always better to stick and move rather than lay into them with a series of long combos. Go for brief 2-3 hits and then move away to avoid their follow-up attacks. And unless you have decent strength and endurance for your character, it's always better to roll out of the way of its attacks. Though if you have a shield with parry sub-ability -- and you're willing to take a risk -- you can stun Margit with a well-timed parry. However, if you miss the timing, you leave yourself open to a devastating attack.

Once you clear half its health, Margit enters a second phase where they'll pull out a massive hammer. While their patterns are still similar, Margit's extra aggression makes for a more tense fight. The best thing to do is stay composed and look at their patterns to find an opening. And always stick with dodging as opposed to blocking. If you try to block their hammer, you will lose your stamina and open yourself up for attack. Remember to stick and move, and keep your attacks brief when fighting Margit, and you will eventually defeat them.

If you're still struggling, another option to make the fight slightly easier: Visit the Murkerwater Cave dungeon, north of the Dragon Burnt Ruins. Inside the case, you'll encounter a boss named Patches, a recurring character from previous FromSoftware games. If you spare his life after he yields in combat, he will open up his inventory for purchase. One item he sells is Margit's Shackle, which will stun the boss during its first phase only, allowing you to go in for a series of strikes. This is a great way to overcome Margit if you need extra help with the fight

Godrick The Grafted

vlcsnap-2022-02-24-13h47m12s646.png

The battle against Godrick will be a real test of patience and resolve. It'd be best to bring in some back up for him.

FromSoftware / Namco Bandai Games

If you make it through Stormveil Castle, then you've already picked up skills and tactics when it comes to overcoming foes. However, the battle with Godrick is, by far, the biggest hurdle you'll need to overcome. As the first demi-god you'll fight, this fallen ruler of Stormveil Castle will pull out all the stops to take you out. Much like Margit, Godrick is speedy despite his size. But unlike Margit, Godrick has a larger arsenal of weapons and skills to use.

Before this fight, one thing you can do to make it easier is to summon an AI character. Nepheli, a traveling warrior, is someone you'll first meet in the Roundtable Hold, and you can find her again in Stormveil Castle near Godrick's location. If you speak with her, she will help you during the battle. Just outside the door to Godrick, you can see her summon sign. It's recommended you call in an assist in this fight, as having a backup will be a big help.

Like the previous fight, you'll need to watch Godrick's patterns to avoid their strikes. One attack to watch out for is a 360-degree wind attack that will encompass the immediate area of Godrick, damaging you and other allies if you stay close. It's important to watch for his tells and avoid his attacks once he gets them ready. It would be best to try to be more aggressive in this battle. Godrick has a lot of health, so playing it safe too long can exhaust you and resources, leading to a sudden defeat. Still, don't be greedy with your attacks.

During his 2nd phase, he'll take a more desperate tactic and graft the head of a dragon onto his arm and use it to attack you. This upgrade for him not only adds a new melee attack to his arsenal, but he can also use his new arm for breathing fire on you, which does considerable damage if you get hit. During this phase, the best thing to do is to keep a medium distance away from him, avoid his area of effect attacks, and then run to his blind spots when he pulls out the dragon head to breathe fire. The flames will only go in front of him, so running up to his side or behind him will protect you while also leaving him vulnerable for extended periods.

One of the important lessons this fight will impact is the importance of placement and position in a fight. Along with being a narrow bridge, the area also has a set of stairs on both sides. The elevation change can prove to be an advantage, as some of Godrick's attacks can miss you entirely if you get the high ground above him or below him. If you can be mindful of his attacks while also keeping your positional advantage, then you will be able to overcome Godrick with patience and a steady rhythm of attacks.

Red Wolf of Radagon

redwolf.png

The battle with Red Wolf of Radagon will test if you can handle a foe adept at magic and close ranged combat.

FromSoftware / Namco Bandai Games

The battle with Red Wolf can be tough, due to how aggressive it is with close-range attacks and its set of long-range magic attacks. Like other major bosses, the Red Wolf is highly mobile, and uses that to its advantage with its attacks. Its deadliest attacks, by far, are the magic missiles, which are homing attacks that will tear right through your defenses and health. The Red Wolf also has a regular habit of priming up its magic spells and then using melee attacks to close the distance, adding further pressure on you. It can be tough to manage, and you'll likely face a quick death during your first attempts.

Thankfully, the Red Wolf doesn't have a second phase, so you'll see most of its patterns and tricks during the first couple minutes of the fight. The important thing to figure out is that the Red Wolf is very aggressive. Yet, that aggression can be used against it. Once it finishes attacking, it will leave itself vulnerable to counterattacks. Given the frequency of its attacks, you'll have plenty of opportunities to go in for quick hits -- provided you dodge its attacks without fail. Don't bother chasing after it; keep your distance and let it come to you. Once it has finished its attacks, strike it and back away. Keep this up for the remainder of the battle, and you will eventually come out on top.

Rennala, Queen of the Full Moon

renalla.png

Rennala is an incredibly powerful magic user, and can easily vaporize your character with her spells.

FromSoftware / Namco Bandai Games

The two-phased fight against magic-wielding Rennala is a bizarre one, but it's still a challenging fight. Unlike other bosses, Rennala likes to keep her distance, use spells, and summon monsters to tear through you. She'll start off with having her academy students fight for her, but once the battle continues, she'll take matters into her own hands -- and that's where things can quickly go south.

The first phase taking place in the library is a strange one. As you can see in the center of the room, Rennala is suspended in the air and it's impossible to reach her. The only way to bring her down is to find three different glowing gold students. They're hidden in the library, so you'll have to run through the area to search for them. Once you destroy three students, Rennala will fall to the ground in the center of the room, opening her up for attack. She won't stay down for long, though. Once enough damage has been done, she'll come back up, forcing you to repeat the previous steps. The biggest dangers in this phase of the fight is the magic that sends furniture hurling towards you, along with some devastating spells that will turn Renalla's students into missiles. The best thing to do is dodge through these attacks while searching for glowing students. After you deal enough damage, Renalla will then get serious.

This second phase is where the fight gets more dangerous. Rennala is an adept mage, and she'll keep her distance away from you while she sends out devastating magic attacks. Many of her spells are homing, which means you'll need to be extra careful when dodging and running towards to close the distance. Also, she'll call in help from her plethora of summoned monsters, many of which are common foes you've fought through the game thus far. These additional enemies are ultimately a distraction. If you focus too much on them, Renalla will snipe at you with her spells, spelling a quick defeat. If you die during this phase, you'll have to repeat the first one again.

The best way to defeat Renalla is to take note from previous bosses and be aggressive. While Renalla has some spells that push you away, she is very weak at close range and easily staggered with attacks. If you are a spellcaster, the best thing to do is to dodge her spells and then cast your own in quick succession. The key to winning this fight is to not hesitate and land your attacks when you see a window of opportunity. If you can keep it up, then you'll defeat Renalla in no time.

Godfrey, First Elden Lord

godfrey

Roll forwards, not backwards!

From Software

Godfrey is the first required boss in Leyndell. He's a big golden brute with a giant axe. Luckily, his attacks, while powerful, are somewhat typical for a boss. 

A good way to start off the fight is with a summon. If you haven't yet, visit the Fringefolk Hero's Grave, which is at the very start of the game behind a fog wall. Complete the dungeon and you'll receive Banished Knight Oleg who is a more powerful summon that can take quite a few hits from bosses. 

As for strategy, the key to his Godfrey fight is to roll forwards, not backwards. Godfrey makes use of his giant axe to reach you as you roll back. If you see him winding up, it's like he's getting ready for a long-reaching attack which is when you want to roll forward. He'll also use this attack when you're backpedaling while trying to heal. 

If there's an attack you want to be aware of it's his stomp. It comes out quickly and will stun just enough to combo into an axe swing if you don't move. If you see a stomp coming, try to use a shield to block the attack instead of rolling away since it can still catch you. 

You'll want to attack when you roll forward into those long axe attacks and when you roll away from his jumping pound attack. In both cases, he takes an extra couple of seconds to reset himself leaving him open to attacks. 

Morgott, The Omen King

If Margit gave you nightmares, Morgott is going to haunt you while you're awake. The Omen King is going to be the toughest challenge you've faced so far unless you have gained a substantial number of levels. Even then, this is far from an easy fight. 

The good news is that you have an orange summon available right outside the golden fog: Melina. If you don't see her symbol, use a Furlcalling Finger Remedy to reveal it. She's going to be vital for the fight as she can heal you while also dealing and taking damage. You'll also be able to use one of your own ash summons, but it's best to save that for the second phase.  

What's important in this battle is speed. Do not attempt long combos against Morgott. Their attacks are so quick, can do multiple hits and will be delayed in order to throw your timing off. What you want is to get in, do a quick jumping attack and run away. This is where having Melina helps because as soon as she becomes targeted, you can get a few more hits in as well as a jumping attack. 

In this fight, rolling back is more ideal as Morgott doesn't have long reaching attacks. If you're far away, they can throw some daggers or a lance that can be easily blocked or dodge. If you see swords floating above, that's a big area-of-effect attack and you want to roll back and avoid any areas where they land. 

Phase 2 starts when Morgott's health gets about halfway. They'll lean over and start coughing. This is your sign to run away because a big blast is about to happen. If you're clear, it's time to for an ash summon in order to get another target for Morgott. 

In the second phase, Morgott does the same attacks, but whenever an attack is missed, a puddle of liquid will be left that will erupt a few seconds after so make sure to avoid them. Aside from that, keep the same strategy of jumping in for quick attacks and then getting out of range. Keep this up and Morgott will go down.

Starscourge Radahn

radhan

The battle with Radahn is one of Elden Ring's most bizarre and epic boss fights. Come in prepared.

FromSoftware / Bandai Namco Games

While not required to complete the main story, this battle against Starscoruge Radahn is one of Elden Ring's most epic boss encounters, and it's one you'll likely find yourself walking into unintentionally. Located just off from Redmane Castle in the Caelid region, the battle with Radahn will see you face off against a towering foe who wields a ludicrous amount of power. Along with that, you'll call in many support characters to help you in battle. It's truly a one-of-a-kind fight, but it's also quite unforgiving. One wrong move against Radahn can result in a quick and brutal defeat.

What makes this battle so difficult is that is Radahn's attack power and range are so high that he can easily kill you within seconds of the fight beginning. He wields a magic-infused bow and twin great swords that can tear through your defenses. Right at the beginning, you'll need to close the distance on Radahn while also taking the time to summon allies to the fight. During this part of the fight, he'll try to pick you off with his arrows, and they deal considerable damage. You'll need to stick with cover, using the piles of old weapons as a shield, and close the distance to Radahn. You'll need to jump on Torrent and begin your attack from here.

This battle has two phases, and you'll need to pick your moments to attack Radahn and make a quick exit to avoid his strikes. For more of a detailed breakdown of the battle against Radahn, check out deeper guide that details the fight and the best strategies you'll need to beat him.


Source

Tags:

The Best Strollers Of 2022: Cost, Convenience And Best Features


The best strollers of 2022 cost convenience and snowball the best strollers of 2022 cost convenience and neighborhood the best strollers of 2022 cost convenience and voluntary the best strollers of 2022 cost convenience and comfort the best strollers of 2022 black the best strollers of 2022 movies the best strollers of 2022 nfl the best strollers on the market the best strollers for toddlers the best strollers for infants what are the best strollers what are the best starting words for wordle
The Best Strollers of 2022: Cost, Convenience and Best Features


The Best Strollers of 2022: Cost, Convenience and Best Features

A stroller can be one of the most expensive purchases you make as a new parent. We say "can" because the stroller market is so vast and varied that your choices range from sub-$100 umbrella strollers to premium models that ask $1,000 and up. With so many different options for wheeling around your bundle of joy, it's easy to become overwhelmed. 

In many ways, shopping for a stroller is like shopping for a car. Just as you'd do for that similarly daunting process, you must first identify your needs. Do you want a small stroller you can take anywhere and deploy and break down quickly, or do you want a large stroller that's more comfortable and can carry more stuff? How many seats do you need? Do you want to be able to swap in a car seat? And how much are you willing to spend? Once you have a better idea of what you want, you can narrow down your options. 

To help you in your search, we tested nine strollers across several different categories. Keep reading to find out which ones deserve your attention.

Read more: How To Choose the Right Baby Stroller for You

Screenshot by Nasha Addarich Martínez/CNET


It's a great idea to buy a convertible stroller for your first baby if you're considering having a second. It gives you the flexibility to add another seat and convert it into a double later on down the line. But while a convertible stroller will work well enough, a dedicated double stroller might better suit your needs. The Baby Jogger City Mini GT2 Double is an all-terrain side-by-side double stroller with several advantages over a convertible double stroller. For one, its maneuverability doesn't change with the number and size of the kids it's carrying. A convertible double stroller has its seats arranged in a tandem configuration. If you have an older toddler in the front seat, the added weight over the front wheels will affect your steering effort. A side-by-side doesn't have that problem if you don't exceed the stroller's weight limits.

Another benefit of the side-by-side layout is the ease of getting your child into the seat. Since there's nothing in front, lifting them into the seat is a breeze. My 3-year-old liked to climb into his seat himself, though this was a double-edged sword as he could just as easily climb out if he wasn't buckled in. Buckling him in was easy when I just used the waist belt, but the shoulder straps' interlocking harness system was tricky. The harness parts all go together a certain way, and getting them to stay that way while your child is squirming can be challenging. Another shortcoming is the small under-seat storage basket. It's a relatively small space for such a large stroller, though it will fit a backpack-style diaper bag, provided you can squeeze it past the crossbar right over the basket. There are also no cup holders, so if you want a place to dock your latte, you'll need to buy one separately from Baby Jogger.

Being an all-terrain stroller, the GT2 Double has larger wheels and a fantastic suspension that provide a smooth ride on pavement and more off-road capability for outdoor excursions. To set the brake, simply pull the lever on the right rail. 

One drawback of side-by-side double strollers is that they're wide. The GT2 Double will fit through standard-size doorways, though sometimes just barely. You need to be aware of the placement of the back wheels when pushing through a door to avoid snagging them. The stroller's extra width makes it less ideal for cruising narrow store aisles. It's best suited for wide-open spaces, so the GT2 Double has become my go-to theme park stroller. As I already mentioned, it's supremely maneuverable and very easy to get my kids in and out of. Thanks to the individually reclining seatbacks and flip-up footrests, it's also great for taking naps. If one child falls asleep, you can lean them back and pull down the sunshade, which provides generous coverage.  

Folding the GT2 Double is as easy as pulling the straps on the seats. The stroller collapses neatly in half, though you need to be ready for the top to swing down to avoid smacking your shins. Carrying the GT2 Double by those straps is easy enough, but at 36.5 pounds, it's far from being a lightweight stroller. Getting it in and out of your car requires some muscle, especially if you lift it over and into a conventional trunk. Additionally, its substantial width makes it bulky even when folded, so you'll need to clear a good amount of space to make room for it.  

Price: At around $700, the GT2 Double isn't cheap. But it makes life with two young kids a little bit easier, and for that, I say it's worth every penny.

Screenshot by Nasha Addarich Martínez/CNET

Unless you're a stroller enthusiast, you probably won't notice when another parent rolls up next to you with a fancy set of wheels. But everyone will notice the Wonderfold W4 Luxe. This imposing four-seat stroller wagon stands at 4.5 feet tall with the canopy fully extended and is just over 4 feet long. On walks, it will take up most of the sidewalk. Despite its size, the largest Wonderfold model is relatively easy to maneuver, though don't expect it to navigate tight corridors and aisles. You will feel the weight of the wagon (plus your kids) when pushing uphill or for long periods, but the large 12-inch wheels in the rear make that task less laborious.  

The Wonderfold W4 Luxe is kind of like a Pack 'n Play on wheels and, as such, it's spacious. The wagon comes with two bench seats, which accommodate two children each. The shoulder room will be tight with two toddlers on one bench, but it's manageable. We usually install the front-facing bench for our two kids, leaving space for blankets, toys and whatever else they need in the front of the wagon. I like that the walls are tall enough that my 3-year-old can't just jump out whenever he wants, and he likes the secret zipper door in the front that allows him to crawl in and out when opened. The canopy is simple and effective, providing plenty of shade no matter the sun's position. When not needed, the canopy rods slide out and stow neatly in the back of the wagon. Also in the back is a large external cargo basket that can hold your diaper bag and more.

The W4 Luxe's best feature is also its biggest downside: it's massive. The wagon weighs 58 pounds in total, and while folding it does shrink it down substantially, it's still bulky. This isn't a stroller you can fit easily in an average-sized trunk. You need to be able to fold some seats down or have a truck bed to toss it into -- and even then, lifting it in and out won't be easy. With all that said, the Wonderfold W4 Luxe isn't well suited for everyday stroller duties. 

Price: This wagon will set you back by $900. But if you have two or more kids and go on regular family adventures, the W4 Luxe is a fantastic option that you'll get years of use out of.

Screenshot by Nasha Addarich Martínez/CNET

After more than 60 years in the baby products game, Chicco has earned a reputation among parents for being a trusted brand. In the competitive stroller market, Chicco's offerings fall right in the middle of the price spectrum, and even though its strollers aren't super high-end, they offer a lot of bang for your buck. The Chicco Corso is a perfect example. 

The Corso is a full-size, single-seat travel system stroller, which means it was designed from the outset to be compatible with a car seat (in this case, the Chicco KeyFit range). Though the Corso's seat is suitable for newborn babies (it reclines fully and comes with an infant insert), it's easier to keep your little one in their car seat, remove it from its base, pop it into your stroller and go. Doing this avoids transferring your baby, which is a game-changer if they're sound asleep and want them to stay asleep.  

The Corso is a midrange stroller, so it feels plain compared to high-end offerings in the same class. Some of its materials are somewhat rough to the touch, and overall the seat lacks the plushness you might expect based on its upscale, modern design. I tested the Corso LE model, which does add a few more premium features, such as a faux leather wrap for the handlebar and bumper bar and a larger cargo basket with cup-holder pouches. It also upgrades the wheels from plastic to a treaded rubber design. These enhancements help raise the Corso's luxury quotient, but if you're expecting Uppababy or Nuna levels of quality, you'll be sorely disappointed.        

What the Corso lacks in luxury, it makes up for with practicality and value. The Corso is handy with a supple ride that's easy on your hands and your baby. The seat has three recline positions and will lay flat. Meanwhile, the canopy provides good coverage thanks to a zip-out extension. I love the one-handed folding mechanism, similar to the Chicco Bravo and it comes in handy when you've got a baby occupying your other hand. Once folded, the stroller stands on its own -- a highly underrated feature.

The Corso is often paired with a KeyFit infant car seat (the standard Corso gets the KeyFit 30 while the Corso LE gets the KeyFit 35). That makes sense since a travel system stroller works best when you have the car seat it's designed to work with. You can, however, buy the Corso separately.

Price: At around $500, the Chicco Corso is a versatile stroller that looks chic and performs well and is a comparable option from Uppababy or Nuna.    

Screenshot by Nasha Addarich Martínez/CNET

It's rare for a stroller to live up to its marketing hype, but the Veer Cruiser does just that with a rugged design that offers capability and utility in spades. The Veer is a versatile stroller wagon that seats two children. The wagon can be pulled or pushed, though pushing requires some getting used to as it steers from the back in this configuration. In keeping with its extreme outdoorsy image, the wagon is designed to be hosed down when it gets dirty. This is a great feature, especially if your kids spill food from the center snack tray. 

The Veer Cruiser's 12-inch rear wheels help it crawl over uneven terrain, while the front wheels with integrated suspension help smooth out the ride. The sides of the wagon are at a good height for a toddler to rest their arms on and they can easily climb in and out. Though the sides, seat backs and handle bar collapse flat, the Veer Cruiser is still bulky when folded due to its large wheels. It's also on the heavy side at 32.5 pounds.

The Veer Cruiser has many useful features out of the box, but some conveniences that come standard on other strollers are only available as optional accessories. For example, if you want shade for your children, you'll have to fork over an additional $60 each for the retractable canopies. If you want more cargo space, the rear cargo basket will set you back at around $80. The advantage of offering everything à la carte is you can customize your Veer Cruiser to your heart's content with unique colors and prints. The Veer Cruiser is undoubtedly a pricey option (especially after accessories), but you'll appreciate this wagon's versatility and robustness if you find yourself outdoors often. 

Price: At $699, the Veer cruiser is pricier than other strollers on this list. But if you enjoy having the option to fully customize your stroller to your ever-changing baby needs, it may be well worth the price.

Screenshot by Nasha Addarich Martínez/CNET

Full disclosure: I've owned an original Minu since 2018, so I've had a lot of time to consider what it does well and where it falls short. With that said, I can say the changes UppaBaby made to the Minu V2 go a long way towards addressing the issues I had with the original. The UppaBaby Minu is the brand's lightweight, compact stroller. Its significantly smaller dimensions make it well-suited for traveling on a plane, but the Minu also works as an everyday stroller.

The Minu V2 builds on the original with small but meaningful improvements. The latch that keeps the stroller together when folded is now hinged and spring-loaded, making it easier to release and unfold. The canopy has been redesigned with a zip-out extension, replacing the previous pull-down shade that got loose and floppy over time. There's also an adjustable leg rest, a welcome addition for naps in the stroller. 

These enhancements only make a great stroller even better. The Minu V2 still boasts exceptional maneuverability and a smooth, comfortable ride for a small stroller. Storage space is limited, but there's enough room in the cargo basket to stow a backpack-style diaper bag. Another reason you'll love it is it fits just about anywhere. There's no need to worry about clearance issues when you're rolling through a densely packed store -- and no matter what other junk you have in your trunk, odds are the Minu V2 will fit. Unfortunately, one feature that hasn't been updated is the two-pedal brake system. Normally, you step on the red pedal to set the brakes on both wheels and step on the green to release them, but in some cases, the pedals stick and fail to lock or unlock both wheels. This is an annoyance but won't affect functionality too much as you can still set the brake manually on each wheel.

Price: The Minu V2 is priced at around $450, which is high for a compact stroller. But its ease of use and overall build quality will ensure that you get plenty of mileage out of it. 

Screenshot by Nasha Addarich Martínez/CNET

If you like the idea of the Veer Cruiser but can't bring yourself to spend that kind of money on a wagon, the Evenflo Pivot Xplore is a compelling alternative that's substantially easier on your wallet. Like the Veer, the Pivot Xplore is an all-terrain stroller wagon with a reversible handlebar that allows you to pull it like a wagon or push it like a stroller. It seats two kids facing each other and comes with a detachable snack tray that snaps in the middle. It also comes with two canopies and an external cargo basket, features that are available only as optional accessories on the Veer.

The Pivot Xplore's large wheels with foam-filled rubber tires perform well on uneven terrain, though not as big as the Veer's. In addition to being competent off-road, the Pivot Xplore rides smoothly on pavement and requires little effort to push or steer when in stroller mode. The seats are spacious, offering plenty of room for your kids to grow thanks to a deep, expandable footwell and wide seat cushions. Drop the wagon's front rim to get in or out, and your kids can come and go as they please. The three-point waist belt is easy to use and holds them securely in place if you need them to stay put. 

Storage is another thing this stroller wagon does well. Each seat has an interior side pocket for storing snacks, sippy cups, toys or whatever your kids pick up on the trails. There are also two exterior pockets that are a good size for storing water bottles. The basket hangs off the back of the wagon and provides a decent amount of space for jackets or a small diaper bag. Do keep in mind that it can get in the way of your legs when pushing in stroller mode. 

It's tough to avoid bulkiness with a wagon, especially an all-terrain wagon with large wheels. The Pivot Xplore weighs 34.7 pounds, but it doesn't feel that heavy loading it into your car when folded. The folding process is straightforward, but it does require some muscle to get the two ends of the stroller to scissor in half and click together in the middle. 

Price: At just under $400, the Pivot Xplore offers a tremendous amount of value for the money. For nearly half the price of the Veer, you get almost as much utility.

Screenshot by Nasha Addarich Martínez/CNET

If you're a parent that's constantly on the go, you need a stroller that can keep up with your busy lifestyle. The Ergobaby Metro Plus is a compact stroller that offers a lot of convenience and takes up hardly any space at all when folded. 

Thanks to its compact dimensions, the Metro Plus can fit just about anywhere, whether you're making your way through a crowded store or rolling down the narrow aisle of an airplane. It also folds up small enough that it's approved for stowage in the overhead bins of most airlines, which is great because a stroller comes in handy when boarding or deplaning with a toddler. At just under 17 pounds, the Metro Plus is exceptionally light. Moving it from one car to another is effortless, especially since you don't have to rearrange your trunk to get it to fit. 

The Metro Plus is reasonably spacious for a compact stroller with a well-padded seat. The seatback reclines flat for nap time and has an adjustable leg rest. The canopy is mounted high on the stroller, limiting coverage, and there's no visor extension. Meanwhile, the cargo basket is decent for a small stroller and has a good clearance between the bottom crossbar and the basket. I also appreciate the adjustable handlebar, a feature I wish the Minu had. The Metro Plus rides well on smooth surfaces, but it can get bumpy going over chunky asphalt. The stroller is supposed to fold with only one hand, but I found the folding mechanics awkward and almost always had to use two hands to origami it into the correct position. It could just take some getting used to, however.

I wouldn't recommend the Metro Plus as your only stroller, but it works great as a lightweight second stroller that you can quickly grab and go. 

Price: At right around $300, it's a fair bit cheaper than the Minu. 

Other strollers we've tested

Screenshot by Nasha Addarich Martínez/CNET

Because the stroller market is so competitive, manufacturers need to keep innovating new features to make their products stand out. One such innovation is the self-folding mechanism, a design that allows a stroller to fold itself automatically without operator assistance. If you frequently have your hands full by the time you get to your car, this is huge, as you have one less thing to worry about when you're trying to get your baby back in the car. The Evenflo Gold Otto is a new addition to the niche self-folding stroller segment, and though it's not perfect, there's a lot to like about it. 

For starters, it's true to its name. Just press the button on the handlebar and the Evenflo Otto automatically collapses down. To unfold it again, hit the same button and pull the handlebar up to watch the stroller snap into position. When folded, it's not quite as compact as the other travel strollers I tested, but it's still easy to squeeze into your trunk or the back seat. It could use some improvement in the ride and handling department. The Otto uses small foam wheels and doesn't have much in the way of suspension. As a result, the ride can be bumpy at times. The wheels on my tester squeaked more than I liked. 

Price: The Otto only costs around $200. If you can live with the above issues, the Otto would make a great second stroller for running quick errands. 

Screenshot by Nasha Addarich Martínez/CNET

The Chicco Cortina Together is a dedicated double stroller with seats arranged in tandem or in-line configuration. It has some handy features, but like other strollers in this category, it also has some major downsides. But first, let's go over what it does well. The Cortina Together can accommodate two larger toddlers thanks to spacious seats with high backs. Additionally, the stroller can accept two Chicco infant car seats (KeyFit 30/35 or Fit2) without adaptors. There's also a nifty parent tray with two built-in cup holders and a small storage compartment beneath the handlebar. The storage basket is large, though not as large as it appears since about one-third of it serves as the footwell for the rear seat.   

Now on to the stroller's drawbacks. The Cortina Together is difficult to push and steer when loaded up with two kids. Its small plastic wheels don't roll well on anything but smooth surfaces, and the suspension doesn't do much to dampen the ride over rough pavement. When folded, the Cortina Together is long and unwieldy, and though it might fit in a large, mostly empty trunk, you'll need to clear a good amount of space for it in most cars. It's also fairly heavy at 36.6 pounds. 

Price: At around $320, the Cortina Together isn't too expensive, but there are better double stroller solutions out there. 

How we tested

I began researching the most popular strollers online, looking for models with stand-out individual reviews and high aggregate review scores. After acquiring a sampling of strollers from various categories and price ranges, I tested them over several months. On the many walks around the neighborhood, visits to the park, shopping trips and all-day excursions during that time, I evaluated each stroller based on the following criteria:

Convenience: How easy is it for the parent to use, break down and transport?
Comfort: How do my children like riding in it? Do they get sweaty from the seat material? Are the straps comfortable to wear?
Ride and handling: How smooth is the ride? How easy is it to push and steer?
Value: Do you get your money's worth for the price you pay?

Stroller FAQs

What are the different types of strollers?

It seems like the stroller market invents new niche categories every year, but here are the basic types of strollers available: 

Full-sized: This is the standard stroller size. Full-sized strollers typically feature more robust construction than compacts and have wider seats. Some full-sized strollers, like the Uppababy Vista, are convertible strollers, meaning they can accommodate a second seat if you want to convert it to a double. 

Double: A double stroller has two seats arranged in either an in-line or side-by-side configuration. 

Travel system: This type of stroller lets you swap the seat out for a compatible infant car seat or bassinet. Because it's modular, you can add pieces as you need them. Another handy travel system feature allows you to flip the seat around, so your baby's facing you. 

Compact: Made for parents who are always on the go, compact strollers offer many of the same benefits as their full-sized counterparts but in a smaller package. They're sometimes called travel or lightweight strollers. 

Umbrella: Even smaller and lighter than a compact, umbrella strollers are great for traveling as they're portable when folded. They also tend to be pretty basic, so don't expect to get many features. But because they're so simple, umbrella strollers are affordable choices. 

Jogging: Parents who can't live without their morning run might consider a jogging stroller. These purpose-built buggies have large wheels and beefed-up suspensions to handle rough terrain. They usually also include air-filled tires and a hand-operated brake to help you slow down. 

Stroller wagon: As the name implies, stroller wagons are one part wagon and one part stroller. They're great for when your kids are a little older as they offer more space. They also give you more cargo options than a typical stroller. 

Car seat carriers: Like a travel system stroller, a car seat carrier will snap into an infant car seat. But that's all they're designed to do. They're sometimes called stroller frames, which is apt because that's exactly what they are. Since there's no seat or anything in the way of creature comforts, these tend to be relatively inexpensive. 

Can you use a stroller for a newborn?

According to the American Academy of Pediatrics, a baby should be able to hold their head up between their first four and six months. Before that, they lack the muscle strength in their neck to keep their head upright. That means most stroller seats aren't suitable for newborn babies. One exception is if your stroller can recline completely flat. Some companies also make newborn inserts for their stroller seats, which give your baby a little more support in a seat that's frankly too big for them.

But even though you can put your baby in some stroller seats, it's probably best to keep them in a car seat or bassinet. Travel system strollers are great options, as they give you flexibility from birth to toddlerhood. If you don't have a true travel system stroller, you might still be able to get an adapter for it that will allow you to use your car seat.

Do you need more than one stroller?

No, you don't need more than one stroller. But having a second one significantly opens up your options for taking the baby out. That's because you can have two strollers that each specialize in doing one thing rather than having to choose one stroller that's a jack of all trades but master of none. For example, you could pick a full-sized stroller for long outings where you want storage space and ride comfort and pair it with a compact for running quick errands.

If you think you're a one-stroller family, make sure you get something versatile that can meet all your needs. Full-size travel system strollers work well in this role, and if it's going to be your only stroller, you can spend a little more money on one. You might consider upgrading to a premium brand like Uppababy or Nuna.


The information contained in this article is for educational and informational purposes only and is not intended as health or medical advice. Always consult a physician or other qualified health provider regarding any questions you may have about a medical condition or health objectives.


Source

Search This Blog

Menu Halaman Statis

close