Step into a world where the focus is keenly set on How To Print Screen. Within the confines of this article, a tapestry of references to How To Print Screen awaits your exploration. If your pursuit involves unraveling the depths of How To Print Screen, you've arrived at the perfect destination.
Our narrative unfolds with a wealth of insights surrounding How To Print Screen. This is not just a standard article; it's a curated journey into the facets and intricacies of How To Print Screen. Whether you're thirsting for comprehensive knowledge or just a glimpse into the universe of How To Print Screen, this promises to be an enriching experience.
The spotlight is firmly on How To Print Screen, and as you navigate through the text on these digital pages, you'll discover an extensive array of information centered around How To Print Screen. This is more than mere information; it's an invitation to immerse yourself in the enthralling world of How To Print Screen.
So, if you're eager to satisfy your curiosity about How To Print Screen, your journey commences here. Let's embark together on a captivating odyssey through the myriad dimensions of How To Print Screen.
We tried world s first in screen fingerprint reader at walmart we tried world s first industrial research laboratory we tried world s first internet sensation we tried world s first invention we tried world s first roller coaster we tried world s hardest game we tried world s smallest violin lyrics we tried world s strongest man we world energy we world express we tried meme
We tried world's first in-screen fingerprint reader at CES
We tried world's first in-screen fingerprint reader at CES
Using the world's first phone with a fingerprint scanner built into the display was as awesome as I hoped it would be.
There's no home button breaking up your screen space, and no fumbling for a reader on the phone's back. I simply pressed my index finger on the phone screen in the place where the home button would be. The screen registered my digit, then spun up a spiderweb of blue light in a pattern that instantly brings computer circuits to mind. I was in.
Such a simple, elegant harbinger of things to come: a home button that appears only when you need it and then gets out of the way. I would bet several Bitcoins that in-display fingerprint sensors become one of 2018's biggest phone trends, starting with high-end devices like the rumored Samsung Galaxy S9.
But the phone I held in my hands was not the Galaxy S9, which doesn't exist yet. It's a pre-production model by Chinese phonemaker Vivo, and it's still without an official name, price and sale date.
For phone enthusiasts, the real news is that this technology -- which was rumored for the Galaxy S8 and beyond, and also for the iPhone X -- isn't just a bunch of hot air. It's real, and it works.
In fact, the fingerprint sensor -- made by sensor company Synaptics -- lives beneath the 6-inch OLED display. That's the "screen" you're actually looking at beneath the cover glass. You can see it in our photos here.
This is the sensor that makes it all possible.
John Kim/CNET
When your fingertip hits the target, the sensor array turns on the display to light your finger, and only your finger. The image of your print makes its way to an optical image sensor beneath the display.
It's then run through an AI processor that's trained to recognize 300 different characteristics of your digit, like how close the ridges of your fingers are. It's a different kind of technology than what most readers use in today's phones.
Synaptics, which demoed the Vivo phone in a crowded booth at the back of an interminable hallway, says that the fingerprint reader won't suck up much more battery by illuminating your finger, promising that its power management is equal to industry standards.
Because the new technology costs more to make, it'll hit premium phones first before eventually making its way down the spectrum as the parts become more plentiful and cheaper to make.
Vivo's phone is the first one we've gotten to see with the tech in real life, but it's clear this is just the beginning.
Robots, Google Daydream and a lot of rain : Everything you need to know from Day 1 of CES.
CES 2018 : CNET's complete coverage of tech's biggest show.
Video editing on the iPhone was first introduced with the iPhone 3GS, yet some iPhone owners still don't realize how easy this feature is to use. It is incredibly simple to quickly edit a video you just shot so that you can send a specific moment to friends and family members. This can also come in handy when a video is a bit to long to send; quickly trim unnecessary portions of the video out, thus reducing the file size and enabling you to send it. Read on to learn how to edit video on your iPhone.
We have already shown you how to use iMovie on the iPhone 4, but for some of you, iMovie may be overkill for a simple edit, especially if title screens and transitions aren't needed. Here is an easier method.
To get started, launch the Photos app on your iPhone and open the video you want to edit.
Click to enlarge Screenshot by Jason Cipriani
While viewing the video (before playing it) you will see a bar that includes frames from the video. On each end of this bar, you will see a spot that allows you to touch-and-drag each end to a new start or stop point for the video.
Click to enlarge Screenshot by Jason Cipriani
Once you have moved either of the ends, the bar will turn yellow. The yellow bars indicate you have cut out portions of the video. You will also see a yellow Trim button in the top-right corner. At the bottom of the screen will be a single Play button. You can press that button at any time to see what you have trimmed the clip down to.
Click to enlarge Screenshot by Jason Cipriani
If you are having trouble editing to an exact frame in the video, you can edit frame by frame by pressing and holding a finger on either end of the yellow bar. You will see the video spread out, revealing individual frames. Slide the end of the bar to either include or cut out video frame(s).
Click to enlarge Screenshot by Jason Cipriani
Once you are happy with your selection, tap the yellow Trim button. You will then be presented with two options for saving the new clip.
Trim Original: Saves the new, shorter clip, over the original clip. The original clip will be lost.
Save as New Clip: Saves the new clip as a separate video clip. The original clip will still be available.
Select your preferred save method.
Screenshot by Jason Cipriani
Once the video is saved, you can view it in your camera roll. From here, you can send it on via e-mail, MMS and the like (iMessage will be an option once iOS 5 is available).
Similarly, you can edit photos in iOS 5, which is expected to be available later this fall. For a full run down of how to edit your photos in iOS 5, be sure to check out this guide.
Macbook return 999 the return of the disaster class hero the return of the jedi the return of the superhero the return of the gods jonathan cahn the return nicholas sparks
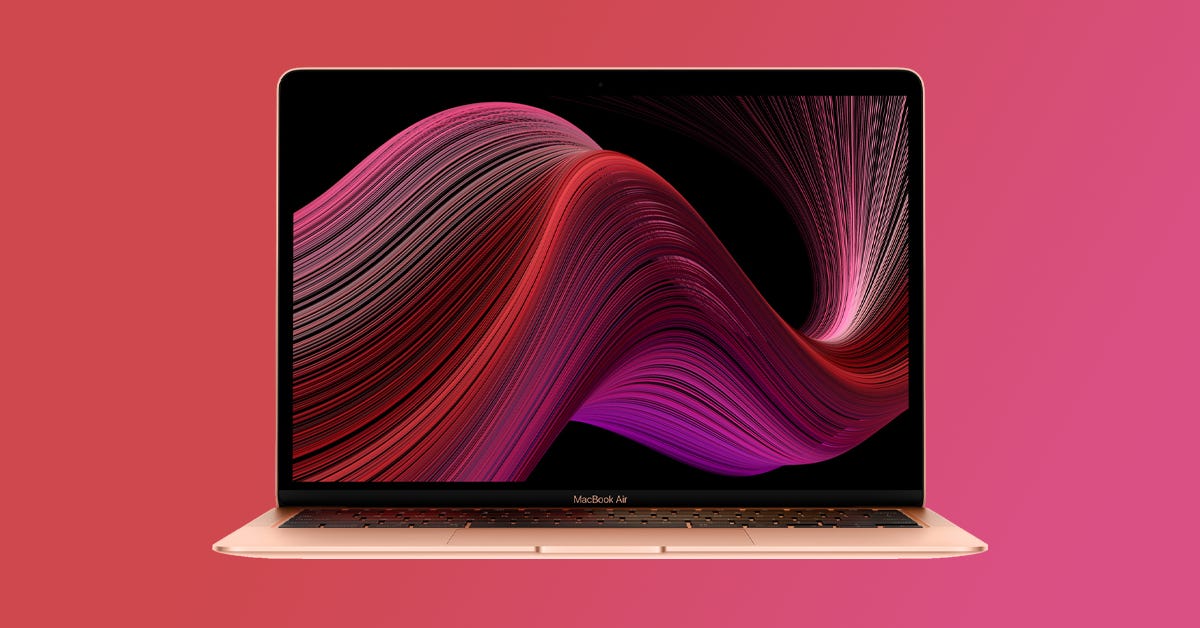
The return of the $999 MacBook Air
The return of the $999 MacBook Air
In a world of incremental computer updates, the latest MacBook Air, announced Wednesday, has a lot of interesting stuff going on inside it. There are new CPUs, including quad-core Intel 10th-gen options. The default storage jumps from a measly 128GB to a more reasonable 256GB. Intel Iris graphics are a step up without adding extra hardware from AMD or Nvidia. And the butterfly keyboard is getting swapped out for the much better Magic Keyboard design from last year's 16-inch MacBook Pro.
But my favorite development is the return to the classic, pre-2018 starting price, $999 (£999, AU$1,599). Well, there's a catch, but we'll come back to that.
Once upon a time
There was once a time I called the 13-inch Apple MacBook Air "the most universally useful laptop you can buy." That was back when the Air was a very college-student-friendly $999 and clearly outclassed anything in the Windows world you could get for the same price. Others might have matched or beat its processor speeds, but the Air had a slim, unibody aluminum shell, a near-perfect keyboard and an OS that wouldn't drive you (quite as) crazy.
But that was a long time ago. Over the years, the MacBook Air fell behind the competition, stubbornly clinging to its design and even most of its specs as other laptops evolved. In 2018, the system finally got a much-needed reboot, adding a high-res screen, slimmer bezels and Touch ID. But at the same time, it also added the much-maligned butterfly keyboard and kicked the price up to $1,199. That was later dropped to $1,099 and many retailers sold it for $999, showing that this product really does have a natural starting price -- $999 is an important psychological and financial barrier, especially for students, writers and anyone who needs maximum reliability and usability on a budget.
The new MacBook Air for 2020.
Apple
Make no mistake, the "big" MacBook Air rebirth happened in 2018, when its design merged with that of the MacBook Pro line. This is a further set of enhancements that doesn't do anything to the outside of the system, but makes some important changes inside.
Keyboard evolution
The most practically important of these is the keyboard. Apple has stuck with its long-suffering butterfly keyboard design far past anyone thought it would. That super-flat style was introduced in the late, great 2015 12-inch MacBook (a misunderstood classic I will defend until the end of time). That said, everyone pretty much hated the keyboard even as it crept across the product line, into the MacBook Air and MacBook Pro models.
The butterfly keyboard underwent several small revisions over the years, never quite making everyone happy (and gaining a reputation for stuck keys and other malfunctions), even if the keyboard hatred was, frankly, overblown.
Then along came the 16-inch MacBook Pro in late 2019. Not only did it make a major move by killing the long-standing 15-inch MacBook Pro screen, leaving Apple without a 15-inch laptop, it pulled the plug on the butterfly keyboard, replacing it with a similarly flat design that had a much better mechanism underneath. At the time, I said "After just a single day of typing on the new Magic-style keyboard on the 16-inch MacBook Pro, I'm ready to retcon the butterfly keyboard back to being a disaster. That's because the new keyboard is positively delightful, which is not praise I offer lightly. Put another way, my first thought early this morning while typing this review on the 16-inch Pro was, "Where the f*** has this been for the last four years?"
Now, that same updated keyboard is in the MacBook Air. No, Apple didn't blow out the screen bezels even more and force in a 14-inch screen, although that would have been interesting to see. Maybe that's waiting for the inevitable upgrade to the 13-inch MacBook Pro, which is now the odd-man-out and least-updated of the MacBook line.
The MacBook Air gets an improved keyboard style, letting go of the butterfly design of the past.
Apple
Finally, as much storage as your phone
One of the things really holding back both budget laptops and the non-budget MacBook Air has been small storage drives. The Air, even in its 2018 refresh (and at a premium $1,199 starting price), included only a 128GB solid state drive. With OS overhead, maybe some games, apps like Photoshop and Illustrator and how high-res photos and videos are these days, that's really not enough.
Unless you're a gamer or video editor, no one really needs 1TB or larger drives, but 256GB is really the new normal, especially if you don't want to feel like you're micromanaging storage all the time. The jump from 128GB to 256GB in the base $999 MacBook Air is welcome, if overdue. The $1,299 step-up version gets 512GB as its default. In both cases, 8GB is the standard RAM, which works only because of how efficiently MacOS deals with it, but really, the 16GB step-up should be the new normal, not a $200 upgrade.
At least you can upgrade that, unlike the 720p webcam, which feels stuck in time and keeps this from being a truly pro-level business machine, although that's a problem that plagues the entire MacBook line.
A core issue
More storage, better keyboard, new CPUs, better graphics. All welcome upgrades. The claim that the Air now has 10th-gen Intel quad-core processors is also welcome, but read the not-so-fine print. The $999 version is a dual-core Intel Core i3, which doesn't sound, at least on paper, like a very premium experience. After all, a Core i3 is what you get in cheap Black Friday doorbuster laptops.
I have not tested it yet, but I'm sure performance from that Core i3 is as good or better than the previous base-model dual-core Core i5 MacBook Air, which is fine for everyday office or student tasks, some modest graphic design and photo editing, etc. But I do cringe a bit at paying a thousand bucks for a Core i3 CPU. Jumping to a quad-core Core i5 is an extra $100, which seems like a smart investment. But then I'd want the 16GB of RAM as well, for another $200. At that point, you should look at the higher-end base model, which starts at $1,299 for the quad-core Core i5 and jumps to 512GB of storage, but again with just 8GB of RAM. So, add $200 to that and you're up to $1,499. At which point you might as well wait for the inevitable 13-inch MacBook Pro update.
No. That's what the obsessive upgrade monster in your head wants you to do. Start with the $999 base model, add $100 for the quad-core upgrade. Based on the on-paper specs for far, that's what you should do. As Kuill would say, I have spoken.
Ipad mini review an excellent 2021 upgrade but still a niche definition ipad mini review an excellent 2021 upgrade but still a niche market ipad mini review an excellent 2021 upgrade buttstock ipad mini review an excellent 2021 upgrade usb ipad mini review an excellent 2021 upgrade magnetic mini ipad mini review an excellent 2021 form ipad mini review an excellent 2021 chevy ipad mini review an excellent wife ipad mini review and reinforce ipad mini sale
iPad Mini review: An excellent 2021 upgrade, but still a niche tablet
iPad Mini review: An excellent 2021 upgrade, but still a niche tablet
What's the most improved product in Apple's lineup this year? It might be the sixth-gen iPad Mini. The company's smallest tablet got the makeover I thought it needed years ago: Now it has the iPad Air's better display, a USB-C port instead of Lightning, a much better processor and better cameras too. You can also magnetically snap an Apple Pencil right onto the side now. Pretty great, huh?
iPad 9th gen vs. iPad Mini 9th gen
iPad 9th gen 2021
iPad Mini 2021
Screen size
10.2 inches
8.3 inches
CPU
A13 Bionic
A15
Starting storage
64GB
64GB
Rear camera
8MP Wide camera
12MP Wide camera
Connector
Lightening
USB-C
Broadband option
4G LTE
5G
Apple Pencil support
1st gen
2nd gen
Weight
1.07 pounds
0.65 pound
Starting price
$329
$499
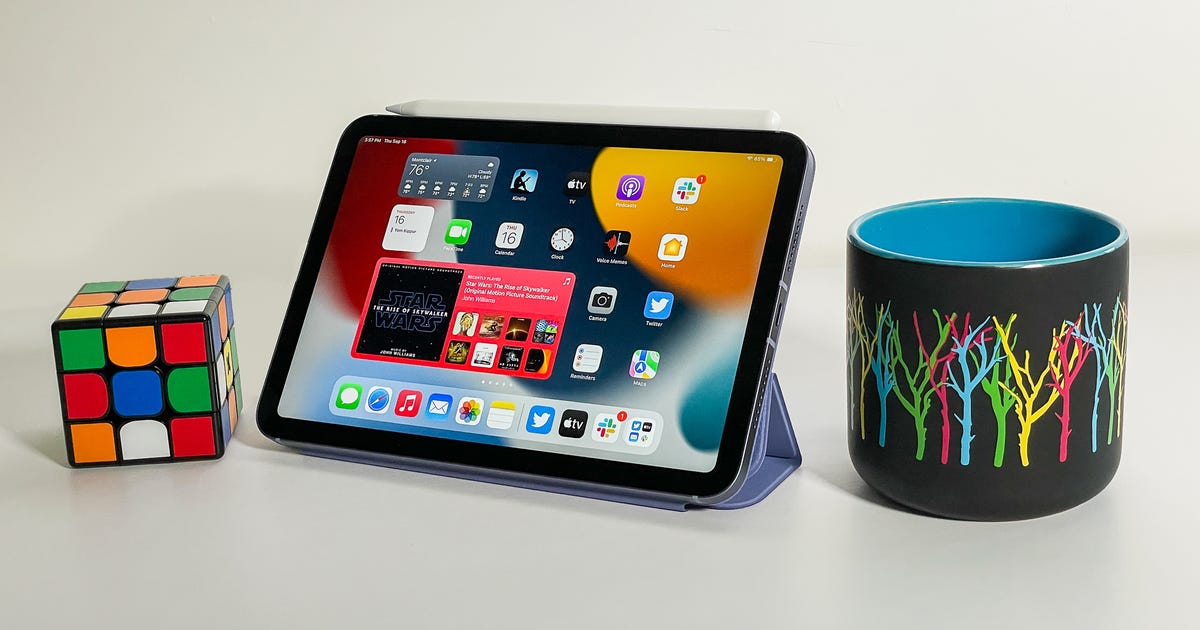
The only problem is, the iPad Mini isn't a must-have gadget. Far from it; as much as the iPad is usually a secondary device for many people, the iPad Mini is often a second iPad. Which makes this a luxury for most. But the 8.3-inch screen, A15 Bionic processor (same as the iPhone 13) and excellent overall performance could make it a first choice for some, and the $499 (£479, AU$49) starting price, while high, isn't as absurdly high as other Apple products.
iPad Minis aren't as necessary with large phones nearby. And the Mini can't do the one thing larger iPads do very well: connect with keyboard cases easily to become sort-of laptops.
But if you think you'll want an iPad that can be an e-reader and gaming device and casual TV screen and sketch pad and notebook and smart home screen, with some email and social media stuff thrown in, this is a pretty lovely choice. If you're OK with its higher-than-basic-iPad but lower-than-iPad-Pro price, that is.
The Mini has grown on me the more I've used it. And really, all of its features seem upgraded, making for a lovely, speedy little tablet. But I won't be doing any serious writing on it. And with iPhones, more affordable iPads and flashy but still-evolving foldable devices all doing what this Mini does (and possibly better), you have to consider this Mini an overdue revamp that's unnecessary for most. Some will absolutely love it, though.
I'm going to stop trying to type on this Mini, and go back to my laptop to continue this review.
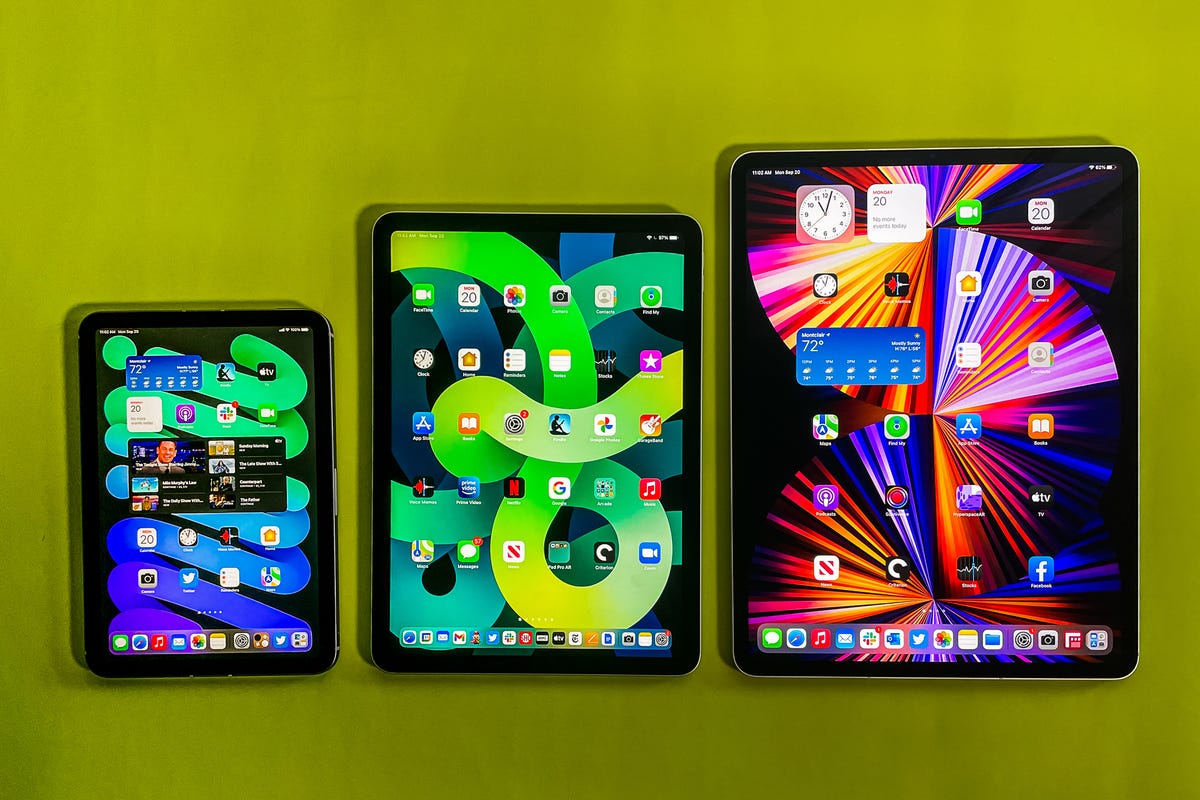
iPad Mini, iPad Air, iPad Pro 12.9-inch: a progression of sizes.
Scott Stein/CNET
It's really small... and growing on me
As I take the iPad Mini out of its box, I think to myself, Oh, this really is small. I'm not sure I like that. After using a larger 12.9-inch iPad Pro recently, this iPad feels extremely tiny. Too tiny. I get used to it, though.
The size of this iPad lines up much more with the folding-phone-phablet-Kindle-Switch landscape. It's more of a relaxed handheld. It feels fine held in one hand, and it's easy to carry around in a pinch. It's got a smaller footprint than the 2019 iPad Mini, in fact, but it's also a bit thicker. The Mini comes in new colors now, but they're very very subtle. Mine is purple, but the matte aluminum finish looks more like a slight variation of gray.
And while that small size could be appealing to some people as a bigger-than-a-phone-smaller-than-most-iPads thing, it also makes using it as a laptop replacement really hard.
The iPad Mini next to the iPhone 12 Pro. The iPad Mini is definitely bigger than that.
Scott Stein/CNET
You can pair a keyboard with Bluetooth, but there's no dedicated keyboard case (maybe Logitech or others will make one). And the usable screen space gets even smaller when you use the onscreen keyboard to type.
You'll also need a brand-new cover, since no older Mini ones fit. The Mini uses magnets on the back so that a wraparound folio cover snaps right on, but like the iPad Pro and iPad Air cases, that won't provide any drop protection.
But yes, this is bigger than an iPhone. It's still significantly bigger than an iPhone 12 Pro (more than twice the size), and I have to admit, I'm carrying it around for reading and games a lot more than I was expecting. But these days, I'm still mostly carrying it around the house.
I stood it up (using the sold-separately smart cover) on my back porch table while putting together a Weber charcoal grill, and called up the instruction manual. It was better than using a phone, but I also thought… hmm, a regular-size iPad would be easier to read.
In the last few days, I've started taking it everywhere. I took it to the doctor's office even though I have a phone. Why? I like the extra screen. I guess it's why people like big folding phones, too.
The iPad Mini's squared-off corners and USB-C port, next to the ninth-gen iPad's older Lightning port.
Scott Stein/CNET
USB-C and a new design, at last
The design of this iPad is completely revamped, much like the iPad Air last year. The flat edges, the sharper screen, the better stereo speakers, a USB-C port, a side magnetic charge strip where second-gen Pencils can snap onto and a side Touch ID home button… this is the total makeover I wanted in the 2019 iPad Mini. I love the look, and it makes me want to use the iPad, even if I'm not interested in using a Mini. It woos me. It all looks great.
But it's not perfect. The repositioned volume buttons on the top edge of the iPad feel weird, though maybe they make more sense when watching videos in landscape mode. And the bezels, while smaller, are still very noticeable to me. They become even more noticeable when using certain apps (see below).
The iPad Mini 2019 (left) versus iPad Mini 2021: Videos look bigger with less bezel.
Scott Stein/CNET
A new aspect ratio means larger videos, but some apps don't benefit
Playing a few games from Apple Arcade, comparing side by side with the 2019 iPad Mini, I think: Wait, does this new iPad display look smaller?
The 8.3-inch, 2,266x1,488-pixel display is a longer display than the 2019 iPad Mini's. It also has slightly rounded corners like the rest of the iPad Pro and Air line. Apple says in the fine print that "actual viewable area is less" than the diagonal measurement. Also, apps that haven't been updated for this new screen size will be pillar boxed with subtle black bars, making the bezels seem bigger and the display seem effectively the same (or even slightly smaller) than the 2019 Mini's. Since this is a prerelease of the Mini, Apple Arcade games currently have black bars, for instance. Safari and Notes and other core apps don't. Some apps will autoadjust, and others will need developers to adapt them (as for previous iPads with different screen sizes).
Documents and things like comics don't always end up looking bigger (iPad Mini 2021 on the left, iPad Mini 2019 on the right).
Scott Stein/CNET
PDFs, graphic books and digital magazines, which often have 4:3 document layouts, also don't take advantage of the larger screen area. It's just a reminder that the "bigger screen" isn't really what it seems to be here.
But it helps for videos, which play in a wider aspect ratio already. There's a bit less letterboxing, and videos fills a larger area of the screen.
A15 performance: Very good
The A15 processor in the Mini is like the one in the new iPhones. Think of it as a hybrid of older iPad Pros and more recent iPhones. The single-core Geekbench 5 benchmark score average I got was 1,598, which is similar to the iPhone 12 models' scores last year. But the multicore score is 4,548, which is close to what Apple's pre-M1 iPad Pros could handle with the more graphics-boosted A12Z chip. Like pretty much every current-gen Apple device, the 2021 iPad Mini is fast enough that you won't have to worry about taxing the system, at least with currently available apps.
Two apps at once can feel small sometimes, but it's almost like two phone screens glued together, too.
Scott Stein/CNET
Multitasking: Mostly works
Holding the Mini sideways with two apps open, it first feels cramped. Then I realize this is close to the two-app split view that the Microsoft Surface Duo has, or that folding phones like the Fold can do. It's kind of like two phone screens side by side, except you can't fold the Mini.
I wanted to hate how small the Mini is, but I'm starting to find multitasking on an 8-inch screen kind of addictive. It's exactly what the iPhone can't do. iPadOS 15 makes swapping apps in and out of multitasking mode a bit easier, but the tiny triple-dot icon on the top of the screen is also easy to accidentally press in some apps, since it's near a lot of top menu bars and icons.
The iPad Mini camera with flash (middle) compared with the iPad 9th gen (left) and the lidar/dual-camera iPad Pro (right).
Scott Stein/CNET
Rear camera with flash, and digital-zoom wide-angle front camera
The Mini's cameras are good: not recent iPhone-level, but more than good enough. A rear flash and 4K video recording will make it good enough for documentation or on-the-spot videos and photos, though it doesn't have multiple rear cameras, and doesn't have lidar scanning like the iPad Pro models do. The front camera has a wider-angle mode that taps into Apple's digital-zooming Center Stage tech, which debuted on the iPad Pro in the spring. It's helpful for face-following while on video chats using FaceTime, Zoom and other supported apps, and is a feature that all Apple devices should add.
So many devices, and the Mini feels a bit like so many of them.
Scott Stein/CNET
Game console? E-reader? Sketchpad? Sure. But… pricey
The size of this Mini sets it up as a gaming tablet, or a Kindle alternative, or a very nice superportable sketchpad. This is what Apple is clearly leaning into with the Mini. There's also a business audience for a revamped and faster mini tablet for point-of-sale or field work.
But add up what this will cost: $499 only gets you 64GB of storage and a USB charger in the box. Buy a case, which you'll absolutely need ($60) and that nice Pencil ($130), and upgrade the storage to 256GB ($150) and you're at $840. Not cheap!
The Microsoft Surface Duo (left) and the new iPad Mini (right). A future glimpse, perhaps, at where the iPad's size could go next...
Scott Stein/CNET
Could this be a phone? Not really
It's tempting. The new Mini has 5G (but read the fine print on that one). It's small. It's sort of lower-priced than iPhones. But there are clear downsides. It's not water-resistant or drop-resistant like an iPhone. It's large, like really large -- you'd need a big jacket pocket or a bag. It doesn't have GPS. There's no actual phone call app. And I don't know why it took me so long to realize, but iPads have no haptics, which is weird. No buzzing for silent notifications, and no subtle feedback in games and in apps.
It really makes me think about using a 5G-enabled iPad Mini as a phone replacement. Apple has a clear gap in its product lineup. The Mini feels like the sort of device that folding phone makers are aiming toward. The Mini is the best option Apple has in that space. But a future iteration could end up being the candidate for a folding display, like the Microsoft Surface Duo or the Samsung Galaxy Fold 3 (which, by the way, both cost a lot more than an iPad Mini).
About that 5G: The Mini's flavor of 5G doesn't support the limited-availability but sometimes very fast millimeter-wave frequency like the iPhone 12 and 13 and the spring iPad Pro do. If you don't know what I'm talking about, 5G signals come in several types, and mmWave (where available) is like a very fast local hotspot. This means, effectively, that this Mini's 5G won't reach superhigh speeds. In suburban Montclair, New Jersey, my Verizon 5G test SIM speeds ranged from 270Mbps to 170Mbps, which is basically similar to LTE. The $150 cellular modem add-on plus monthly fee isn't worth it to me (but maybe your business will foot the bill?)
Using it while putting together a charcoal grill. Second grill, second iPad.
Scott Stein/CNET
It's nice, but niche
I just bought a charcoal grill, a Weber. I already have a gas grill. Why did I do this? I wanted an affordable one that could do charcoal, too. Sometimes people buy second grills. It's a luxury, and a niche. People buy second things. Or specialized things. The Mini is a great total revision, but I wouldn't say it's a must-have… and it's far too expensive (and limited) for kids. (Or my kids, anyway.) For your family, maybe, it might be worth the upgrade if you're in love with the design and don't mind the mini size. But it's the best iPad Mini, if you ever craved one and have the cash to spend. It's a lovely little luxury.
How to edit photo using laptop cheap laptop for photo editing how to edit a photo on laptop how to buy a laptop computer for dummies how to buy stocks how to buy bitcoin how to draw
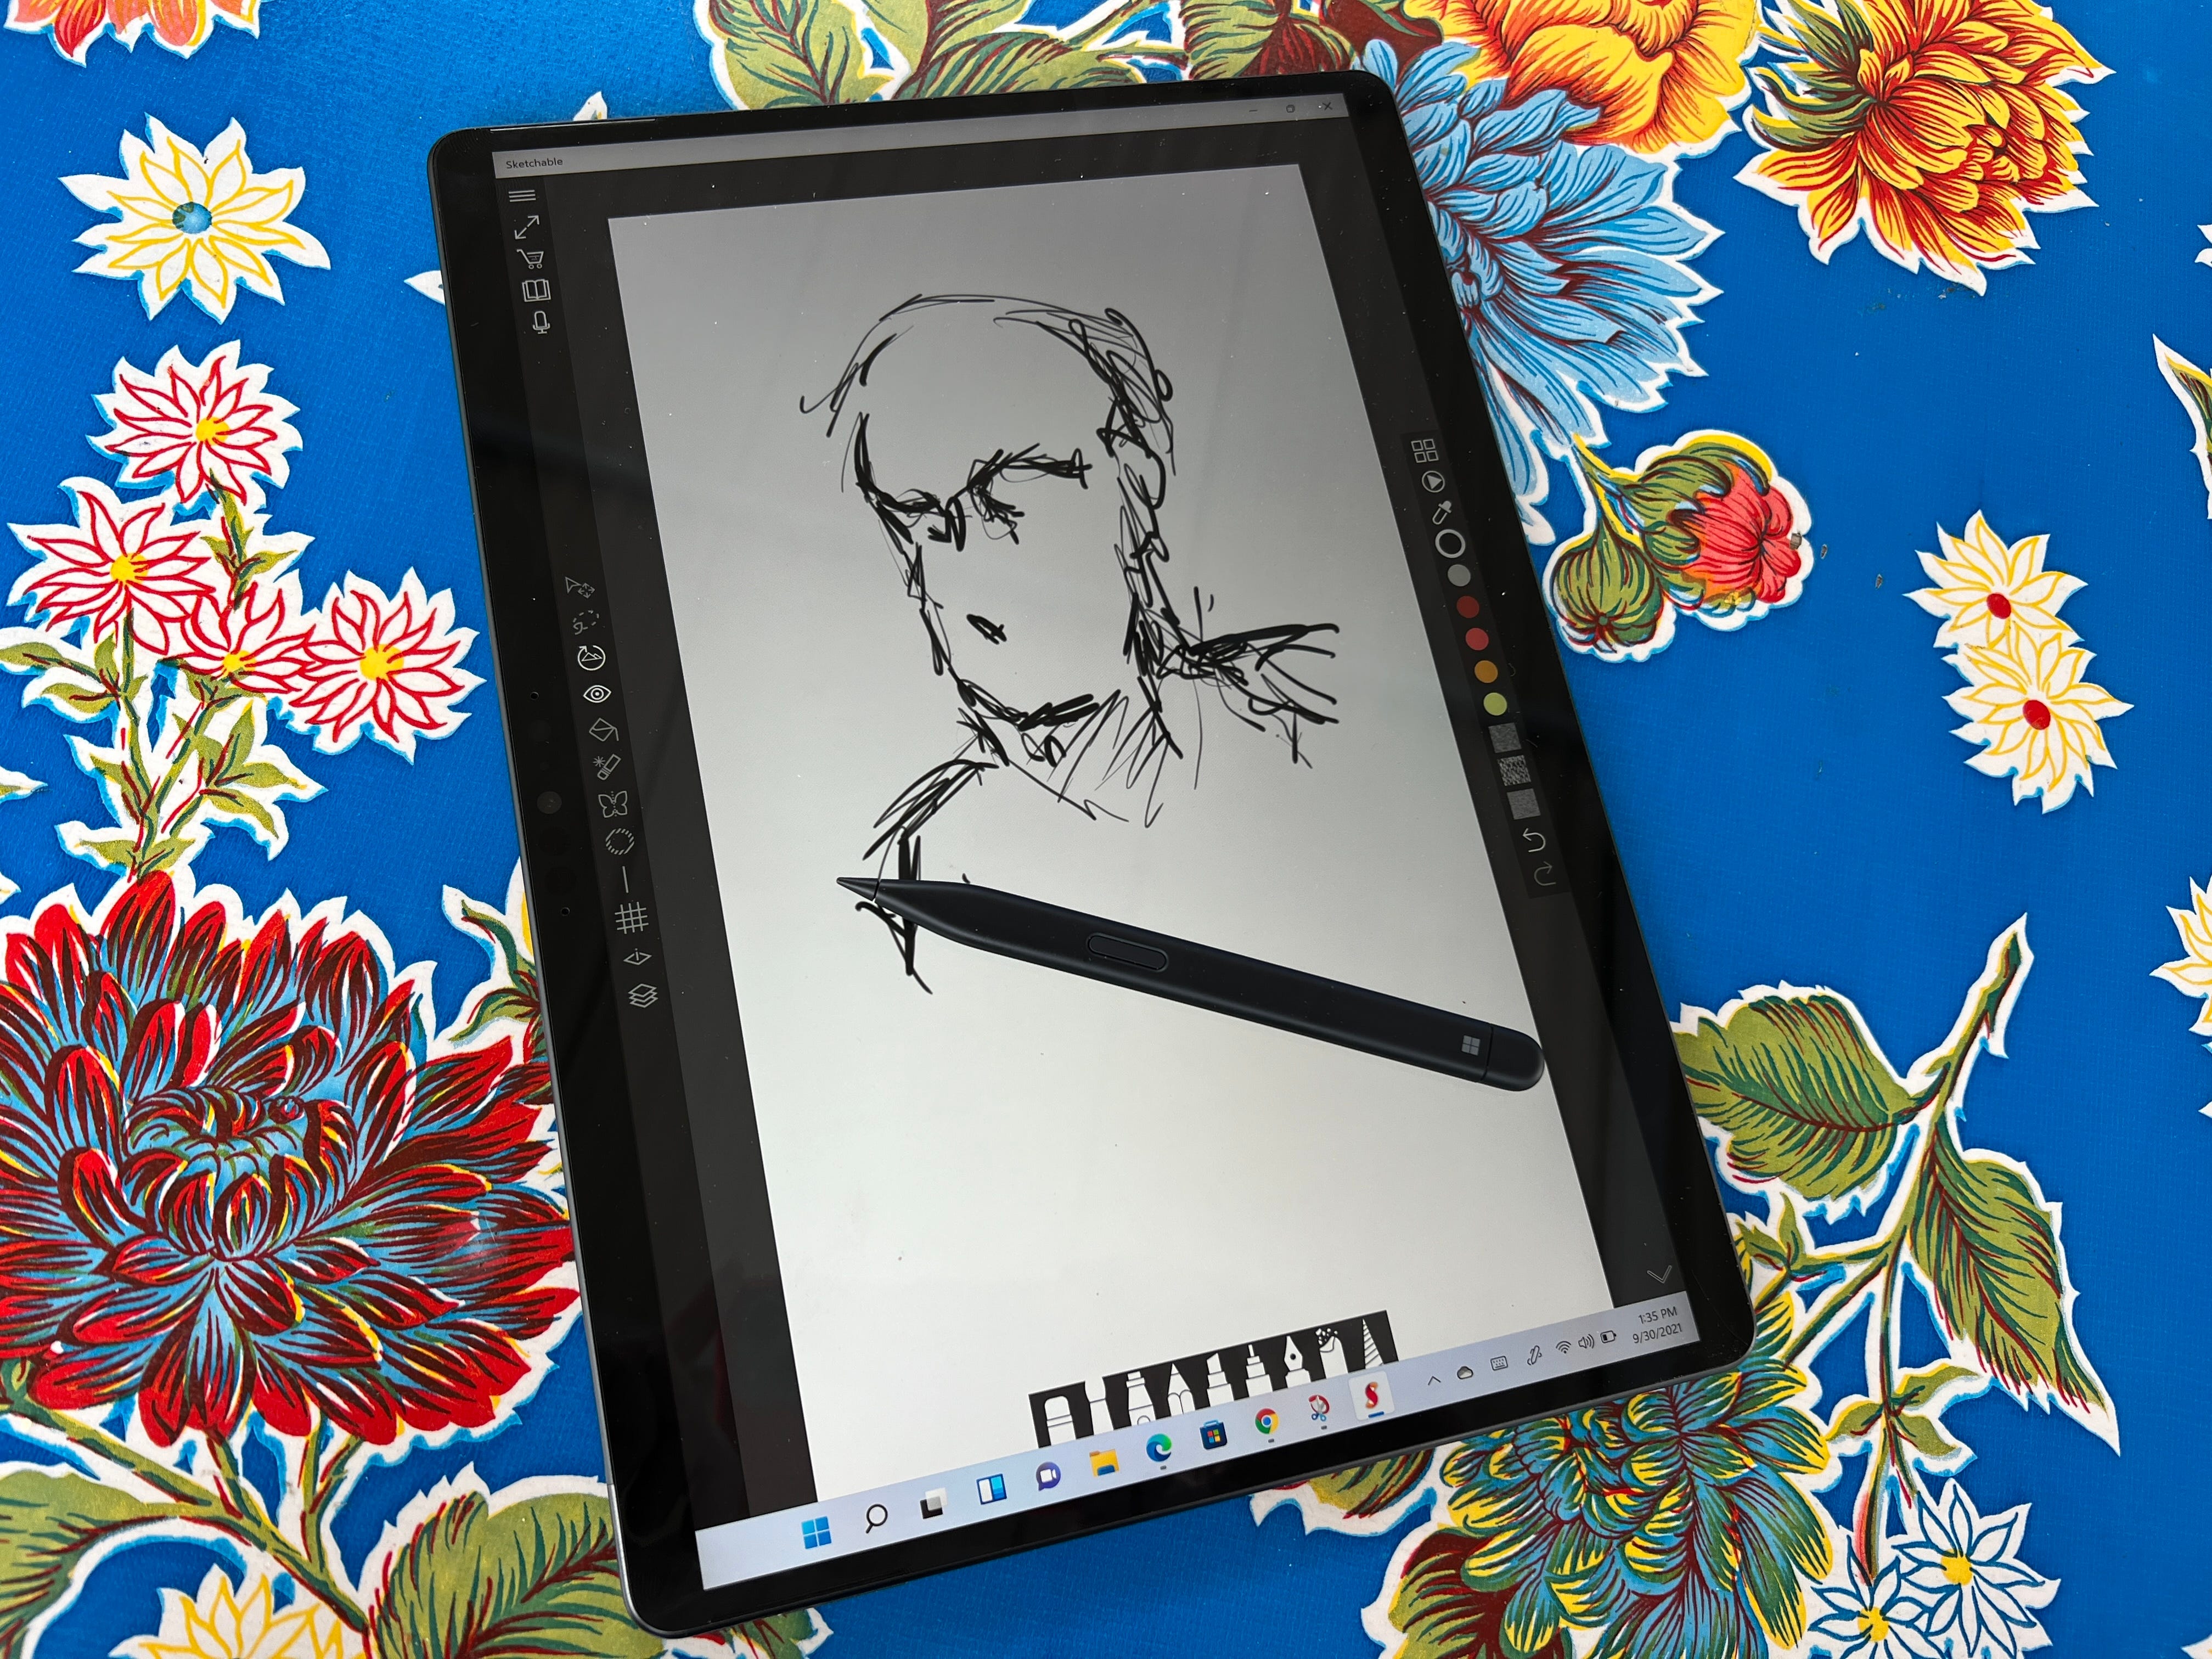
How to Buy a Laptop to Edit Photos, Videos or for Other Creative Tasks
How to Buy a Laptop to Edit Photos, Videos or for Other Creative Tasks
Are you baffled by the multitude of laptop, desktop and tablet options being hurled at you as a generic "creative" or "creator"? Marketing materials rarely distinguish among the widely varying needs for different pursuits; marketers basically consider anything with a discrete GPU (a graphics processor that's not integrated into the CPU), no matter how low power, suitable for all sorts of creative endeavors. That can get really frustrating when you're trying to wade through a mountain of choices.
On one hand, the wealth of options means there's something for every type of work, suitable for any creative tool and at a multitude of prices. On the other, it means you run the risk of overspending for a model you don't really need. Or more likely underspending, and ending up with a system that just can't keep up, because you haven't judged the trade-offs of different components properly.
One thing hasn't changed over time: The most important components to worry about are the CPU, which generally handles most of the final quality and AI acceleration for a growing number of smart features; GPU, which determines how fluidly your screen interactions are along with some AI acceleration as well; the screen; and the amount of memory. Other considerations can be your network speed and stability, since so much is moving up and down from the cloud, and storage speed and capacity if you're dealing with large video or render files.
You still won't find anything particularly budget-worthy for a decent experience. Even a basic model worth buying will cost at least $1,000; like a gaming laptop, the extras that make it worth the name are what differentiates it from a general-purpose competitor, and those always cost at least a bit extra.
Andrew Hoyle/CNET
Should I get a MacBook Pro or a Windows laptop?
If what you're really wondering is whether the Mac is generally better than Windows for graphics, that hasn't been true for a while. Windows' graphics programming interface has gotten a lot better over time, which allows for broader support and better performance in the applications. But performing display calibration on both platforms can feel like walking barefoot over broken glass. Windows, because its color profile management seems like it hasn't changed since it originally launched in Windows NT, and MacOS because interface changes made in Monterey combined with ambiguity about supported calibrators, software and the new MacBook Pro screens has some folks gnashing their collective teeth.
MacBook Pros now have native M1 processor support for most of the important applications, which includes software written to use Metal (Apple's graphics application programming interface). But a lot of software still doesn't have both Windows and MacOS versions, which means you have to pick the platform that supports any critical utilities or specific software packages. If you need both and aren't seriously budget-constrained, consider buying a fully kitted-out MacBook Pro and running a Windows virtual machine on it. That's an imperfect solution, though, since VMs tend to be fairly bad ab out being able to access the full capabilities of the GPU.
Dan Ackerman/CNET
How do I know what specs are important?
The first decision you need to make is whether you'll need a workstation-class system or can get away with a normal laptop; the latter is generally cheaper. In order to use some advanced features, accelerate some operations or adhere to certain security constraints, some professional applications require workstation-class components: Nvidia A- or T-series or AMD W-series GPUs rather than their GeForce or Radeon equivalents, Intel Xeon or AMD Threadripper CPUs and ECC (error correction code) memory.
Nvidia loosened the reigns on its division between its consumer GPUs and its workstation GPUs with a middle-ground Nvidia Studio. The Studio drivers, as opposed to GeForce's Game Ready ones, add optimizations for more creation-focused applications rather than games, which means you don't necessarily have to fork over as much cash.
Companies which develop professional applications usually provide guidance on what some recommended specs are for running their software. If your budget demands that you make performance trade-offs, you need to know where to throw more money. Since every application is different, you can't generalize to the level of "video-editing uses CPU cores more than GPU acceleration" (though a big, fast SSD is almost always a good idea). The requirements for photo editing are generally lower than those for video, so those systems will probably be cheaper and more tempting. But if you spend 90% of your time editing video, it might not be worth the savings.
There are a few generalizations I can make to help narrow down your options:
More and faster CPU cores -- more P-Cores if we're talking about Intel's new 12th-gen processors -- directly translate into shorter final-quality rendering times for both video and 3D and faster ingestion and thumbnail generation of high-resolution photos and video. Intel's new P-series processors are specifically biased for creative (and other CPU-intensive) work.
More and faster GPU cores plus more graphics memory (VRAM) improves the fluidity of much real-time work, such as using the secondary display option in Lightroom, scrubbing through complex timelines for video editing, working on complex 3D models and so on.
Always get 16GB or more memory. Frankly, that's my general recommendation for Windows systems (MacOS runs better on less memory than Windows). But a lot of graphics applications will use as much memory as they can get their grubby little bits on; for instance, I've never seen Lightroom use less than all the available memory in my system (or CPU cores) when importing photos.
Stick with SSD storage and at least 1TB of it. Budget laptops may have a slow, secondary spinning disk drive to cheaply pad about the amount of storage. And while you could get away with 512GB, you'll probably find yourself having to clear files off onto external storage a little too frequently.
Get the fastest Wi-Fi possible, which at the moment is Wi-Fi 6E. Much has become split between the cloud and local storage, and even if you don't intend to use the cloud much your software may force it on you. For instance, Adobe really, really wants you to use its clouds and is moving an increasing amount of your files to cloud-only. And if you accidentally save that 256MB Photoshop file in the ether, you're in for a rude awakening when you try to open it next.
Do I need a 4K or 100% Adobe RGB screen?
Not necessarily. For highly detailed work -- think a CAD wireframe or illustration -- you might benefit from the higher pixel density of a 4K display, but for the most part, you can get away with something lower (and you'll be rewarded with slightly better battery life, too).
Color is more important, but your needs depend on what you're doing and at what level. A lot of manufacturers will cut corners with a 100% sRGB display, but it won't be able to reproduce a lot of saturated colors; it really is a least-common-denominator space, and you can always buy a cheap external monitor to preview or proof images the way they'll appear on cheaper displays.
For graphics that will only be appearing online, a screen with at least 95% P3 (aka DCI-P3) coverage is my general choice, and they're becoming quite common and less expensive than they used to be. If you're trying to match colors between print and screen, then 99% Adobe RGB makes more sense. Either one will display lovely saturated colors and the broad tonal range you might need for photo editing, but Adobe RGB skews more toward reproducing cyan and magenta, which are important for printing.
A display that supports color profiles stored in hardware, like HP's Dreamcolor, Calman Ready, Dell PremierColor and so on, will allow for more consistent color when you use multiple calibrated monitors. They also tend to be better, as calibration requires a tighter color error tolerance than typical screens. Of course, they also tend to be more expensive. And you frequently need to step up to a mobile workstation for this type of capability; you can use hardware calibrators such as the Calibrite ColorChecker Display (formerly the X-Rite i1Display Pro) to generate software profiles, but they're more difficult to work with when matching colors across multiple connected monitors.
How to edit video using photoshop edit video in photoshop cc how to edit video using photoshop how to edit a video on photoshop how to edit a video in photoshop how to edit a video in photoshop how to edit video in photos app windows 10 how to edit video in photoshop how to edit video on canva how to edit videos on obs how to print screen
How to edit video in Photoshop CC and CS6
How to edit video in Photoshop CC and CS6
Screenshot by Lexy Savvides/CNET
Did you know that you can edit video within Adobe's image-editing program? There is no need to learn the ins and outs of Premiere or Final Cut when Photoshop does just fine for some simple edits and transformations.
Video editing has been part and parcel of Photoshop since CS3 Extended. If you are running an older version of Photoshop, here is our tutorial on how to cut video using CS5 Extended.
Photoshop CC and CS6 are mostly the same when it comes to video features. Photoshop can read the following major file formats and more:
.264
AVI
MPEG-4
MOV (QuickTime)
MTS
A full list of supported file formats is available on this Adobe support page.
Getting started
Open up Photoshop and head to the Window menu. Make sure that Timeline is selected, which will bring up the video toolbar at the bottom of the screen. Alternatively, head to Window > Workspace > Motion to bring up the entire suite of video controls.
Now it is time to import the video file. Either drag a supported video into the Photoshop main window or click the filmstrip icon in the timeline and select "Add Media."
Alternatively, for more precise control over the file when it comes to exporting, go to File > New. Select Film & Video from the drop-down menu and change to the appropriate values. Once the new document has been created, import the video file itself by going to Layer > Video Layers > New Video Layer from File.
Screenshot by Lexy Savvides/CNET
The video will now be available for editing in the timeline. Like any traditional video editor, Photoshop lets you scrub through the footage and gives you some basic controls over audio. Note that if you playback the file within the edit window, Photoshop may drop the frame rate to keep displaying the footage in real time.
The next thing you may want to do before launching into the edit is to turn the video layer into a Smart Object. This will allow you to apply filters to the entire video image in one particular layer -- even if there are cuts or transitions.
Choose the correct layer name and then select Layer > Smart Objects > Convert to Smart Object.
A purple clip means that the layer has been converted to a Smart Object. Screenshot by Lexy Savvides/CNET
Once this has been done, any adjustments you make through filters will be reflected in all frames on that particular layer.
Making edits
Editing video using Photoshop uses many of the same principles you may be familiar with when working with still images.
Depending on the camera and lens combination used to shoot your video, you may want to apply a lens-correction filter. Photoshop may be able to automatically detect what camera the video was filmed with. Head to Filter > Lens Correction, and Photoshop should autodetect the camera.
Note that Photoshop may not detect it if the video was created using a smartphone. If this is the case, you can apply corrections to the video image using the Custom tab in the Lens Correction window.
The controls are quite comprehensive, including the ability to add or remove a vignette, make adjustments for chromatic aberrations, or adjust perspective.
Add some custom lens corrections in this window. Screenshot by Lexy Savvides/CNET
Videos can be split by selecting the scissor tool on the Timeline. This will cut the video in two at the position of the playhead. Like any other video editor, in Photoshop you can move clips back and forth to other layers on the Timeline.
The adjustments palette. Screenshot by Lexy Savvides/CNET
Add in any extra audio files using the dedicated Audio Track layer. Click the musical-note icon to import music or other sounds. To make adjustments to the audio recorded with the video file, right-click on the appropriate clip, and then select the musical-note icon to adjust the volume or mute it.
Some basic filters will be accessible via the Adjustments layer palette in the workspace.
Options available include black-and-white, photo filter, curves, exposure, and brightness/contrast adjustments.
Photoshop will include these filters as a separate, nondestructive layer that you can toggle on or off using the regular layers palette.
Toggle adjustments for curves, exposure, and more from the layers palette (on the right) to see the Before and After effect. Screenshot by Lexy Savvides/CNET
Transitions
Photoshop has some common transitions built in, such as fades and crossfades. These can be found in the Timeline toolbar, denoted by the split-square transitions icon.
Select a transition from the menu, then drag it on to the appropriate layer on the Timeline. Transitions can be extended or shortened by dragging the duration slider just underneath the video image on the Timeline. Alternatively, right-click on the transition itself to change the duration with more precise control.
A list of the simple transitions available in Photoshop CC. Screenshot by Lexy Savvides/CNET
To change the speed of a clip, right-click on the appropriate layer. Select "Speed" to increase or decrease playback speed using the slider or a percentage value. To slow down motion, choose a speed such as 50 percent.
Transitions can also be applied to audio. Again, to work with audio recorded with a video, right-click on the appropriate clip, and go to the musical-note icon. Apply fade-in or -out transitions where desired.
Text and objects
Photoshop lets you add text to videos using the same method as still images. First you will want to create a new video group so you can adjust the position of the text and placement over the clip. Do this by selecting the filmstrip icon in the timeline and selecting "New Video Group."
Screenshot by Lexy Savvides/CNET
Select the text tool from the side toolbar, place the cursor on the image, and start typing. Photoshop places the text on a new layer so you can move it to the desired place in the timeline.
To add a transition to text, simply use the same method outlined above for the video image -- just drag the transition over the text layer instead.
Adobe has detailed information on working with more complex motion on its website.
Exporting
When your masterpiece is ready to go, head to File > Export > Render Video. Make any adjustments to Output File Type, or select one of the many Adobe presets to make a YouTube or Vimeo-ready short film. Make sure that "Adobe Media Encoder" is selected rather than "Photoshop Image Sequence", or you will end up with a series of still JPEG images rather than a video.
When you are satisfied with the export settings, press Render, and let Photoshop make your movie.
3 ways to print on t shirts wikihow 3 ways to print on t shirts wikihow 3 ways to write 5 11 3 ways to write division 3 ways to write a division problem 3 ways to manage stress 3 ways to avoid plagiarism 3 ways to be a better ally in the workplace 3 ways to freeze corn 3 ways to conserve water 3 ways switch 3 ways of communication
3 Ways to Print From Your iPad
3 Ways to Print From Your iPad
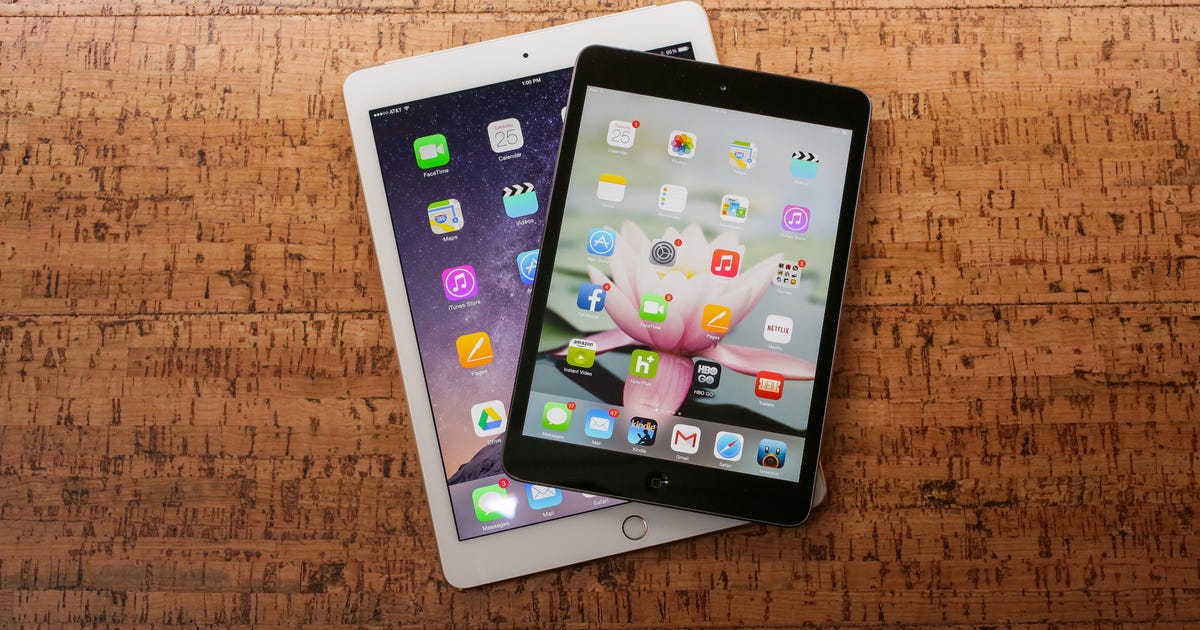
No matter how hard you try to avoid it, especially if you're one of the many people who use their iPad for work or school, you'll eventually want to print something out. Fortunately, the iPad printing situation is a lot better than it used to be. An Apple-designed system, AirPrint, works if you have the right printer -- but even if you don't, we've got a couple of workarounds.
Read more: Best iPad for 2021
AirPrint
The easiest way to print from any iOS device, including an iPad, is to use a printer that supports AirPrint. AirPrint is a technology that printer-makers can integrate into their devices, so you don't need to install additional drivers to make your iPad "talk" to the printer.
Today, many printers come AirPrint-ready. To check if you have an AirPrint printer, or to find one to buy, check out Apple's list here. To print a document, web page, email or anything else from your iPad, do this:
1. Connect your iPad and your printer to the same Wi-Fi network.
2. Find the document, web page or email you want to print.
3. Click the share button (usually at the top or bottom of the screen) and select Print.
4. The printer name should appear. If you have more than one AirPrint printer on your network, select the desired one from the list that appears.
AirPrint alternatives
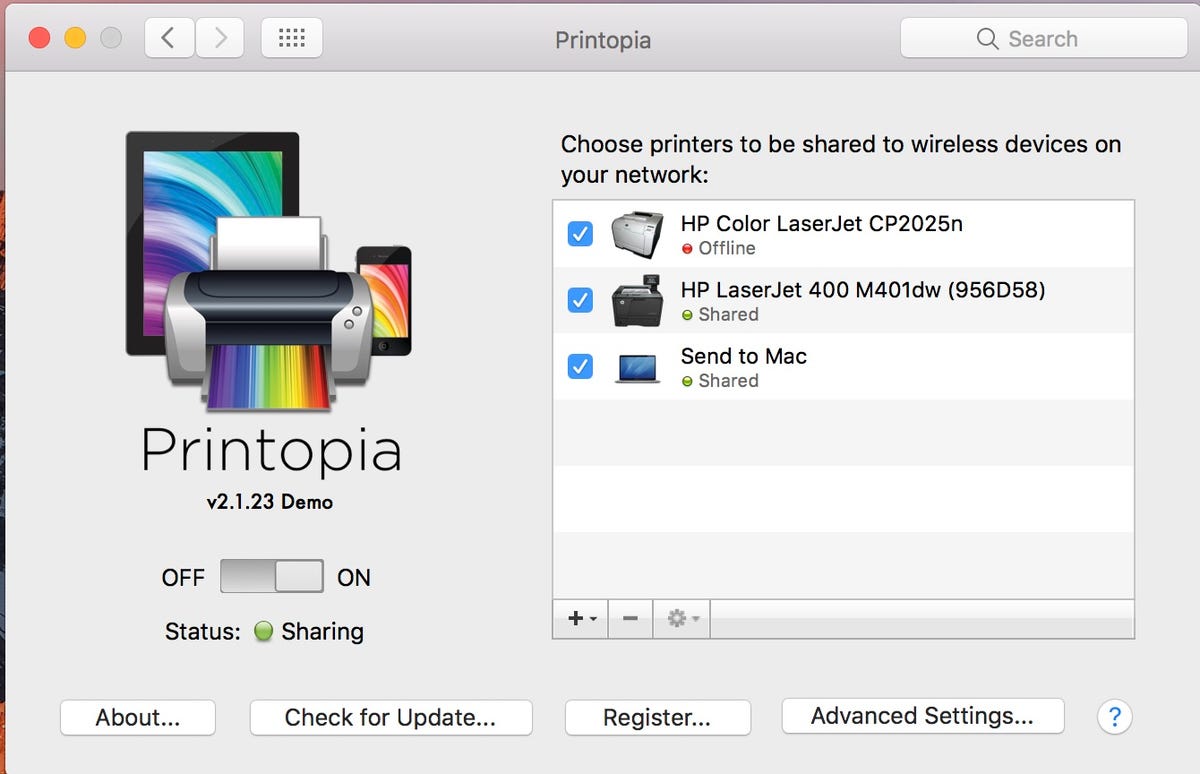
There are several software and cloud-based options if you don't have an AirPrint printer on your network. Google Cloud Print was shut down last year, but Printopia is a popular app alternative that still works. Install the software on your MacOS computer and it allows you to print over Wi-Fi by using your Mac as a middleman, routing the file from the iPad to the printer. The handy thing is that there's no software needed for the iPad -- just install the MacOS software and select your printer to share during the setup process.
Read more: With Two New Models, Which iPad Should You Buy Now?
Printopia will use your Mac as a middleman between the iPad and a printer.
Joseph Kaminski/CNET
There are other programs that achieve the same thing, but this is the one we've successfully tested in our lab. It's free to try and $20 to buy.
Read more: Best Printers of 2021
Proprietary manufacturer app
If your printer doesn't support AirPrint, or you want greater granular control, see if your printer has its own iOS app. Brands such as HP and Lexmark have standalone apps to let you print directly from your iPad or iPhone. HP's is the HP Smart app; Brother has the Brother Mobile Connect; Canon's is the Canon Print Inkjet app; and Epson's is the Epson iPrint. Note that while this guide is primarily aimed at iPad users, these apps will also work with other iOS devices such as the iPhone.
Putting an iPad inside of a printer will not print out your documents, but the steps in this guide will.
How to see jupiter tonight how to see jupiter and saturn from earth how to see jupiter from earth best telescope to see jupiter and saturn let me see what spring is like on jupiter how to see jupiter from earth how to see jupiter s moons how to see cpu temp how to see wifi password windows 10 how to see someone s calendar in outlook how to see chunks in minecraft how to see how much ram i have how to take a screenshot how to clear cache how to screenshot on pc how to get free robux how to print screen
How to See Jupiter's Closest Encounter With Earth in Decades
How to See Jupiter's Closest Encounter With Earth in Decades
If you make a habit at all of skywatching after dark, you've probably noticed a bright star in the east in the evenings lately. That's actually not a star, and it's not Venus -- often one of the most visible planets. It's Jupiter, the largest planet in the cosmic neighborhood, brightening itself up as it comes closer to us than it has at any point in the past seven decades.
The huge gas giant is set to reach something called opposition on Sept. 26, which is when the planet will be opposite the sun in the sky. This is why Jupiter is growing increasingly visible not long after sunset in the east, shortly after the sun sets opposite it in the west.
Put another way, we are at the point in orbit when we're about to pass Jupiter, or we're at the closest point to Jupiter in our orbit relative to where it's in its orbit. Now, because orbits aren't perfectly circular things, the distance between our two planets can vary from opposition to opposition (an opposition with Jupiter takes place roughly every 13 months). It just so happens that this will be the closest our worlds will be to each other in at least 70 years.
So this could be the opportunity of a lifetime to get a good view of Jupiter.
As of right now, Jupiter is already the brightest celestial object in the night sky outside of the moon. It's pretty easy to spot. Just head outside a couple hours after sunset, look at the due eastern horizon and then start to scan upward looking for the brightest object that doesn't appear to twinkle like the other stars.
This is probably also a great opportunity to practice with whatever level of telescope or binoculars you might have handy to see if you can get a more detailed view and maybe even make out a few of Jupiter's largest moons.
The official moment of opposition is on Sept. 26, when Jupiter will technically be at its closest and brightest but probably not a noticeable amount, especially with the naked eye. What will happen on that evening, though, is that the planet will rise very close to sunset and then set very close to sunrise.
But you can get out and get the best view of (a few) generations right now. And mark your calendars for the next planetary opposition, when Mars will be bright in the sky in early December.